
Pani Puri ( Gol Gappa or Puchka) is hands down my favorite Indian street food, followed by dahi puri, sev puri and much more actually. Every time I go back to India, I am in heaven. We would specially stop by different areas of town to eat this dish on daily basis while visiting. After moving to states, we started making it at home from scratch, because it’s very difficult to find good Pani Puri in states. After years of experiments in our family, this dish is finally perfected. You can find pre-made Puris at any Indian grocery store, however it is much better when you make it yourself and much more flavorful when you make it with fresh ingredients.
Pani Puri does sound like a pretty strange name, right? This dish does not have an English name. Even in India, this dish name and recipe differs from region to region. Everything depends on the local culture and flavor used in the day to day cooking. The Puri is basically a crispy sphere filled with filling and all sorts of lip smacking spicy or sweet flavored water. Whenever I make this dish, I have whole table filled with different toppings and fillings, so everyone can have their customized Pani Puri. This dish does require lots of prep work which can be done ahead of time.
Tips to make perfect Puri
- The Puri needs to be crispy, and that is achieved only with the activation of gluten stands in the semolina. That’s why it’s very important to knead the dough well, so it is elastic enough when rolled it without any tearing.
- Make sure to have oil heated on medium-high heat. When you put the Puri to fry, it should automatically begin to float and puff up. Fry them until they are golden brown and crisp. Drain excess oil and set aside.
- Once Puris are completely cooled, you can store them in air tight container for up to 1 month.
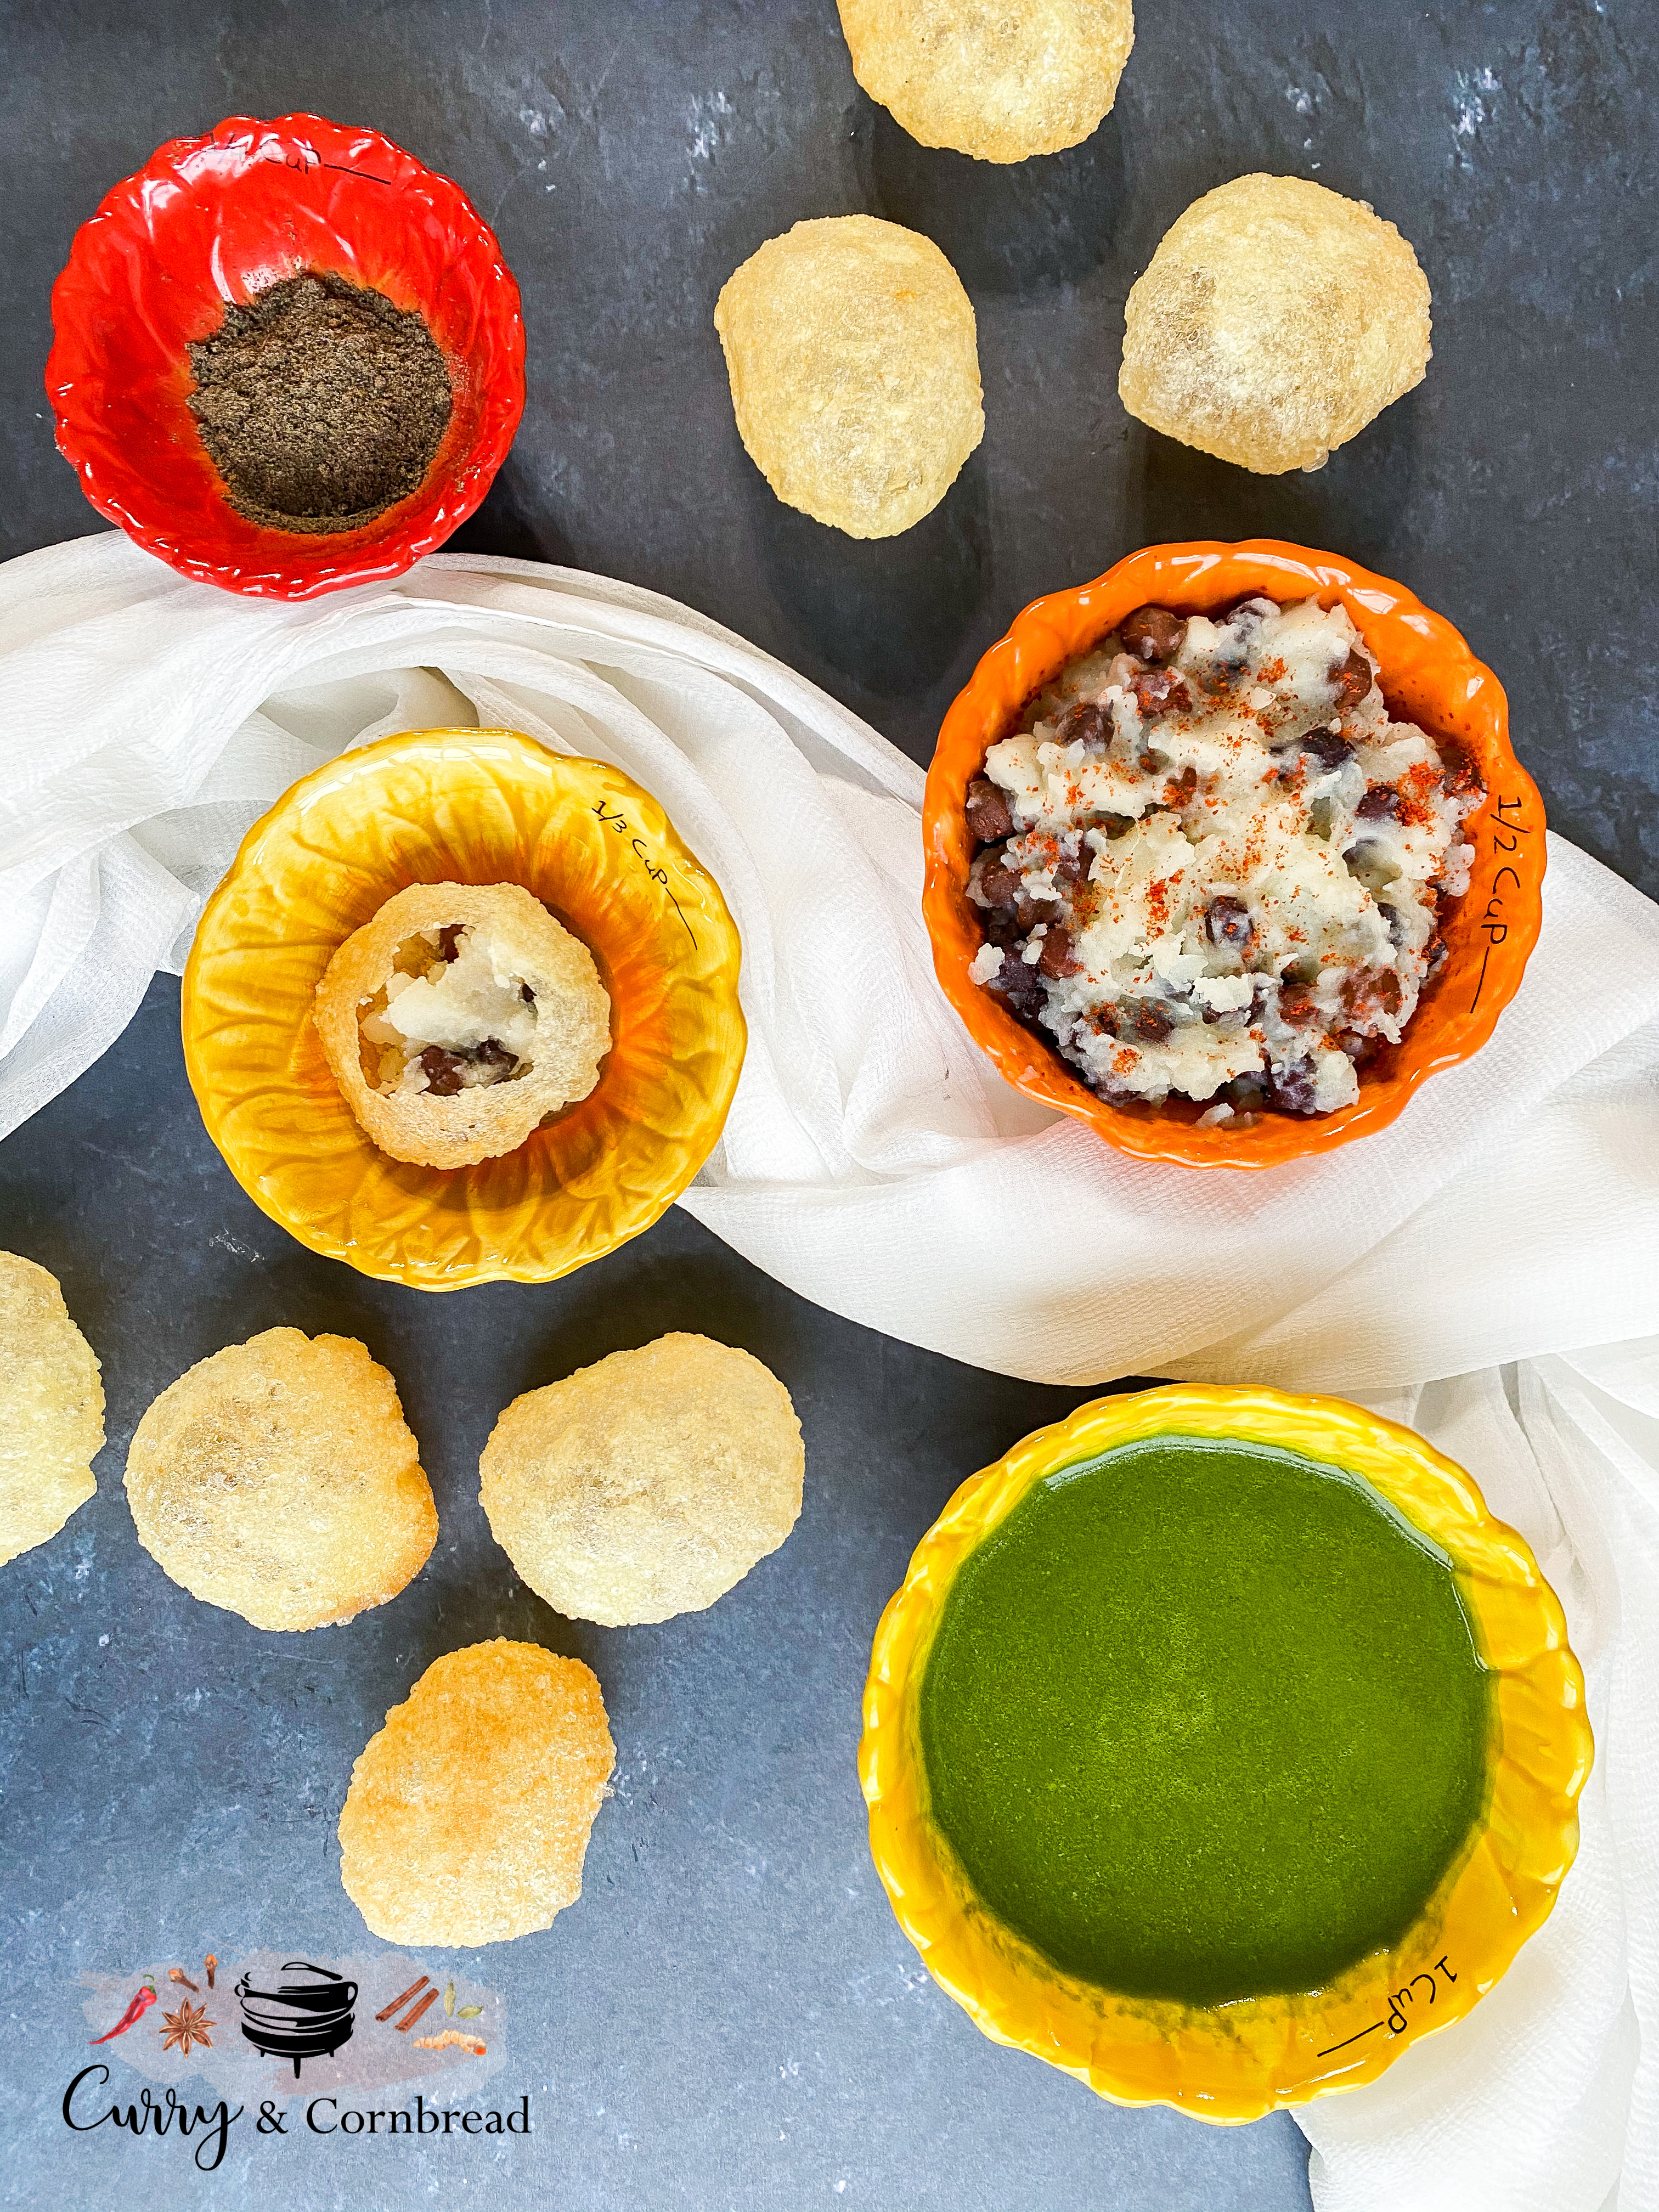
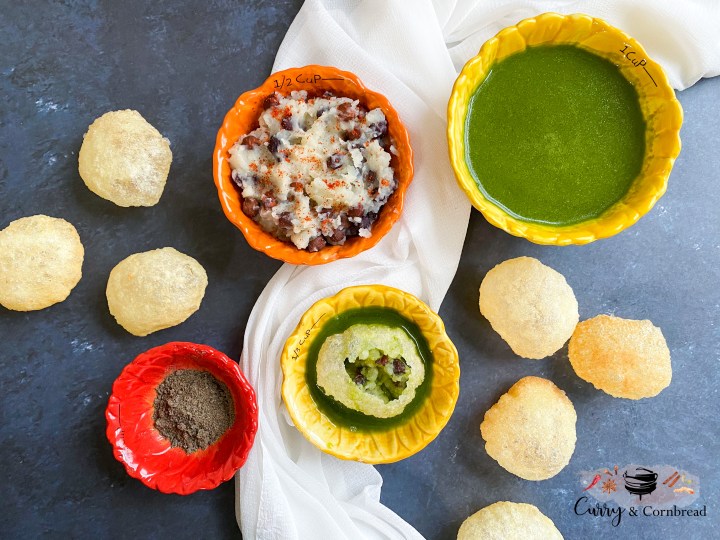
Ingredients
For Puri
2 cups of fine sooji/semolina
½ tbsp oil
¼ – ½ cup of water for kneading (you may need more or less depending on quality of sooji)
Oil for frying
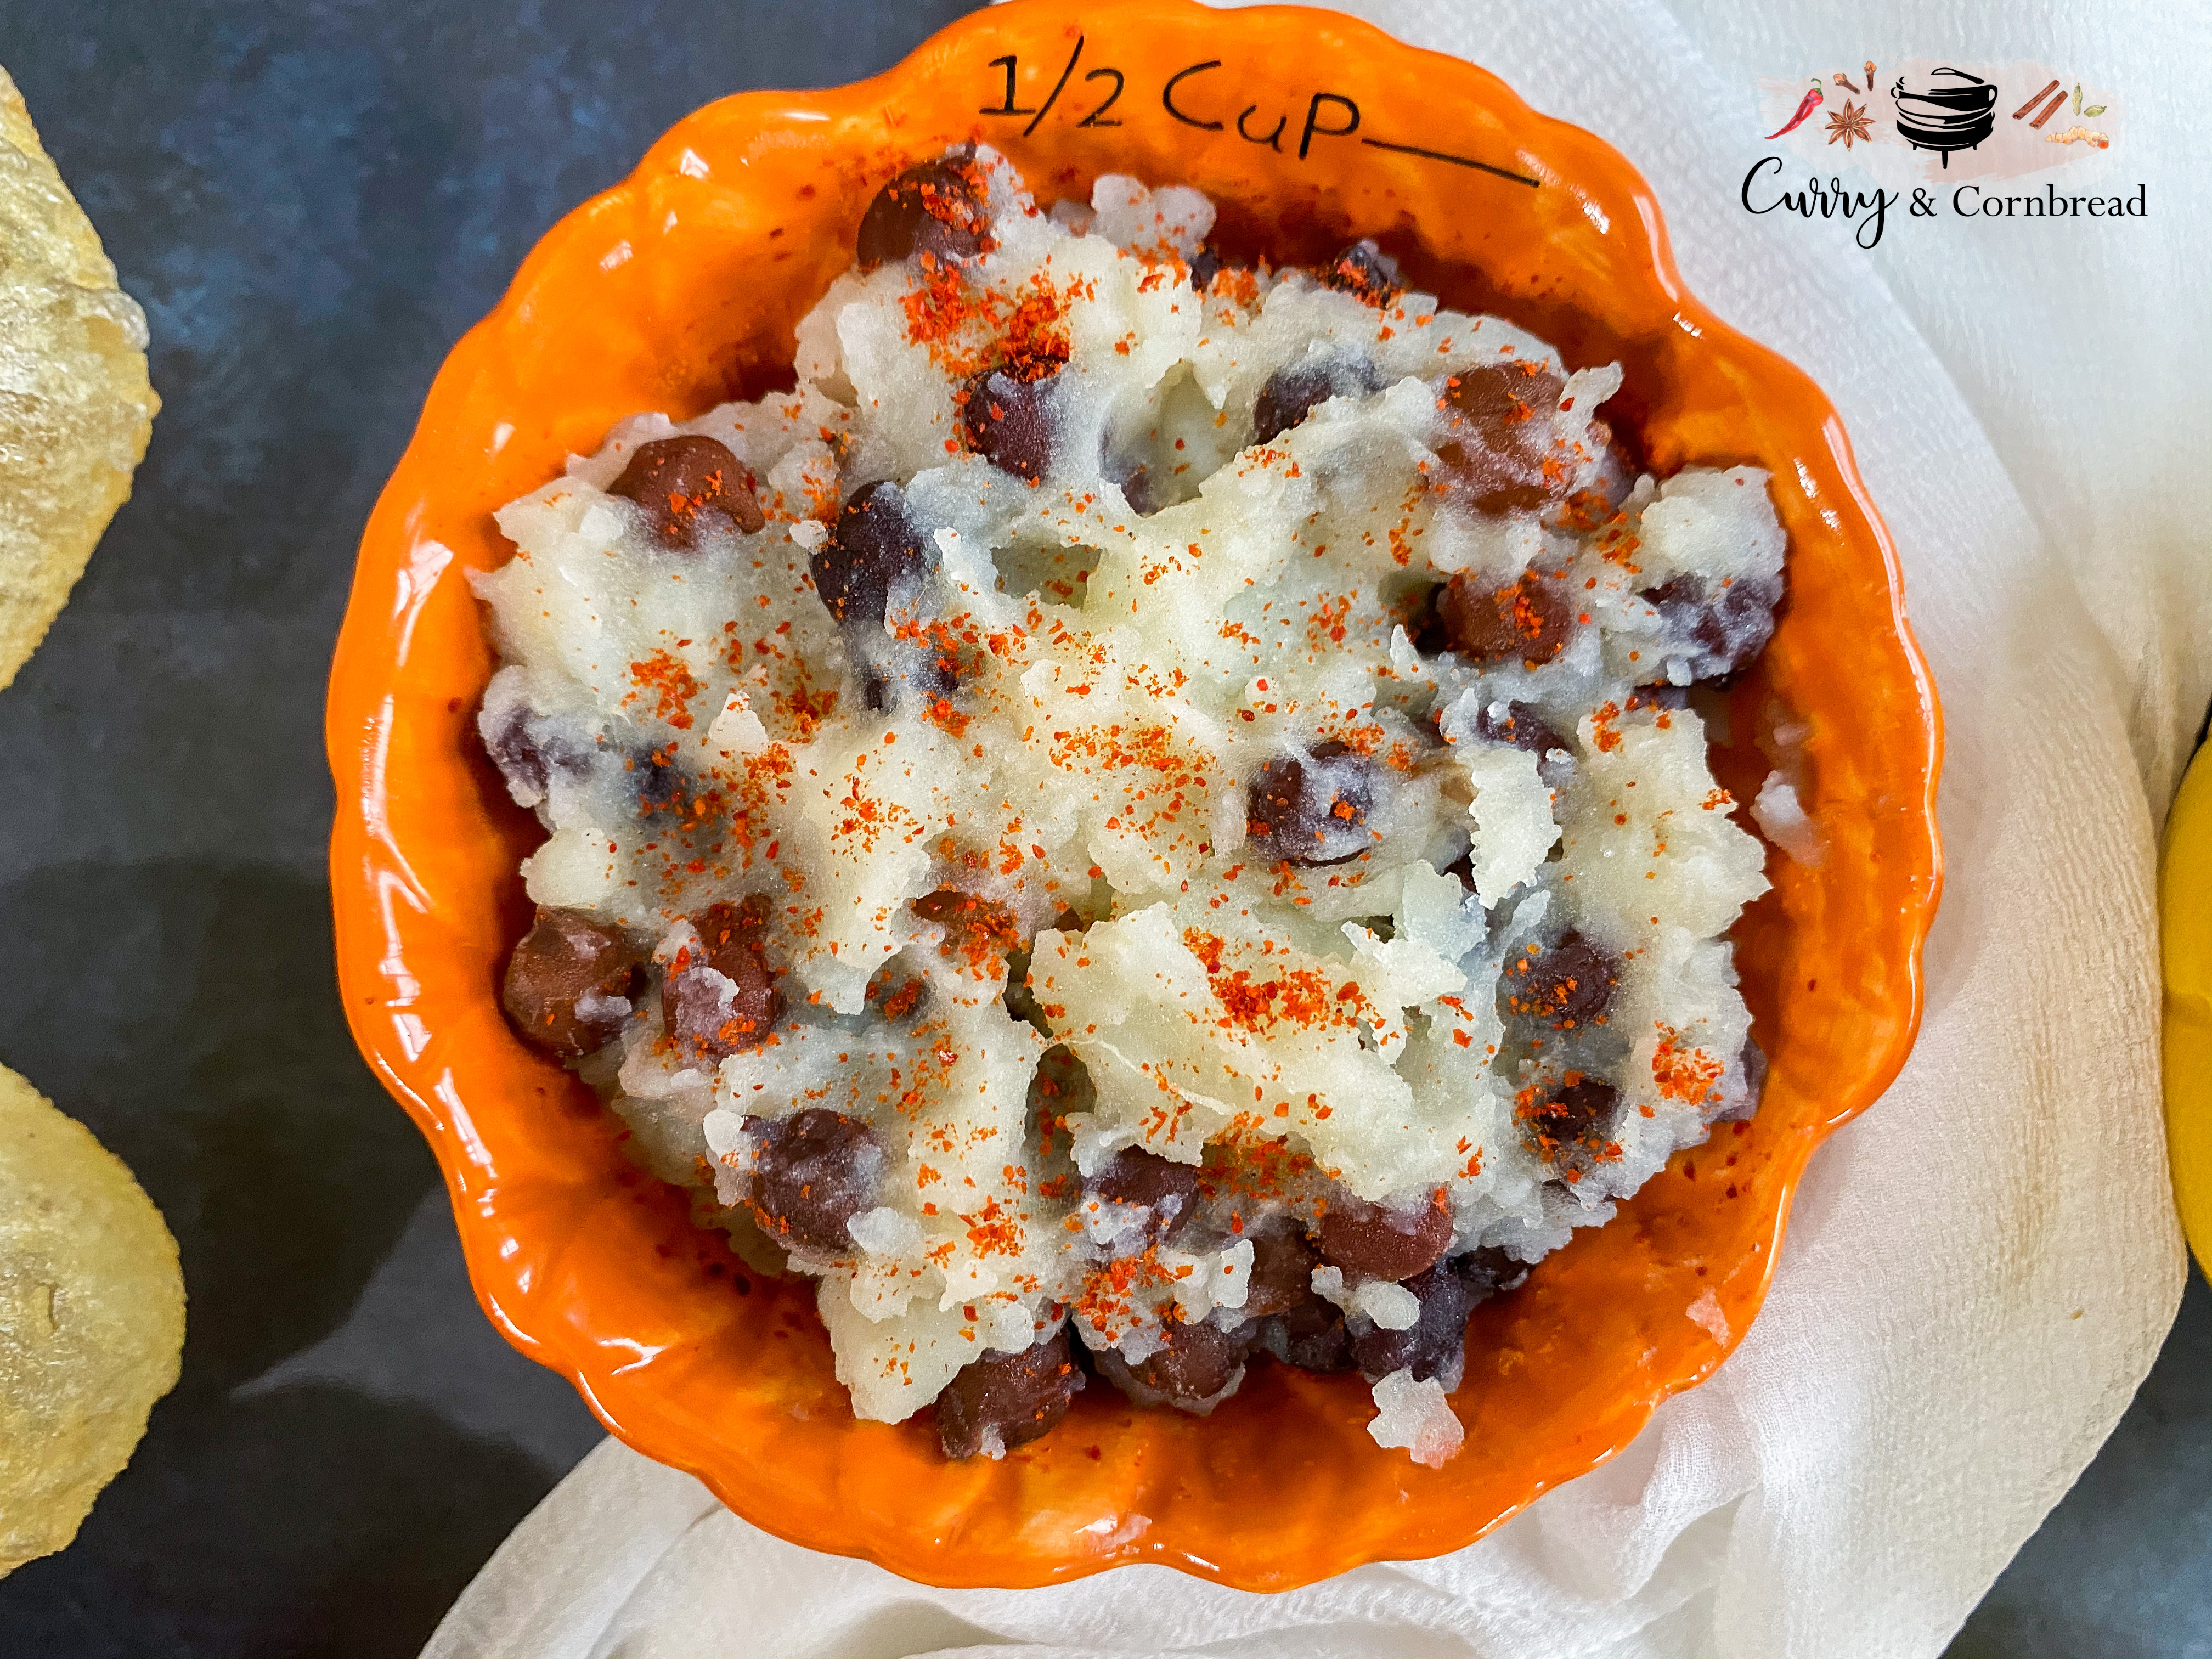
For Stuffing
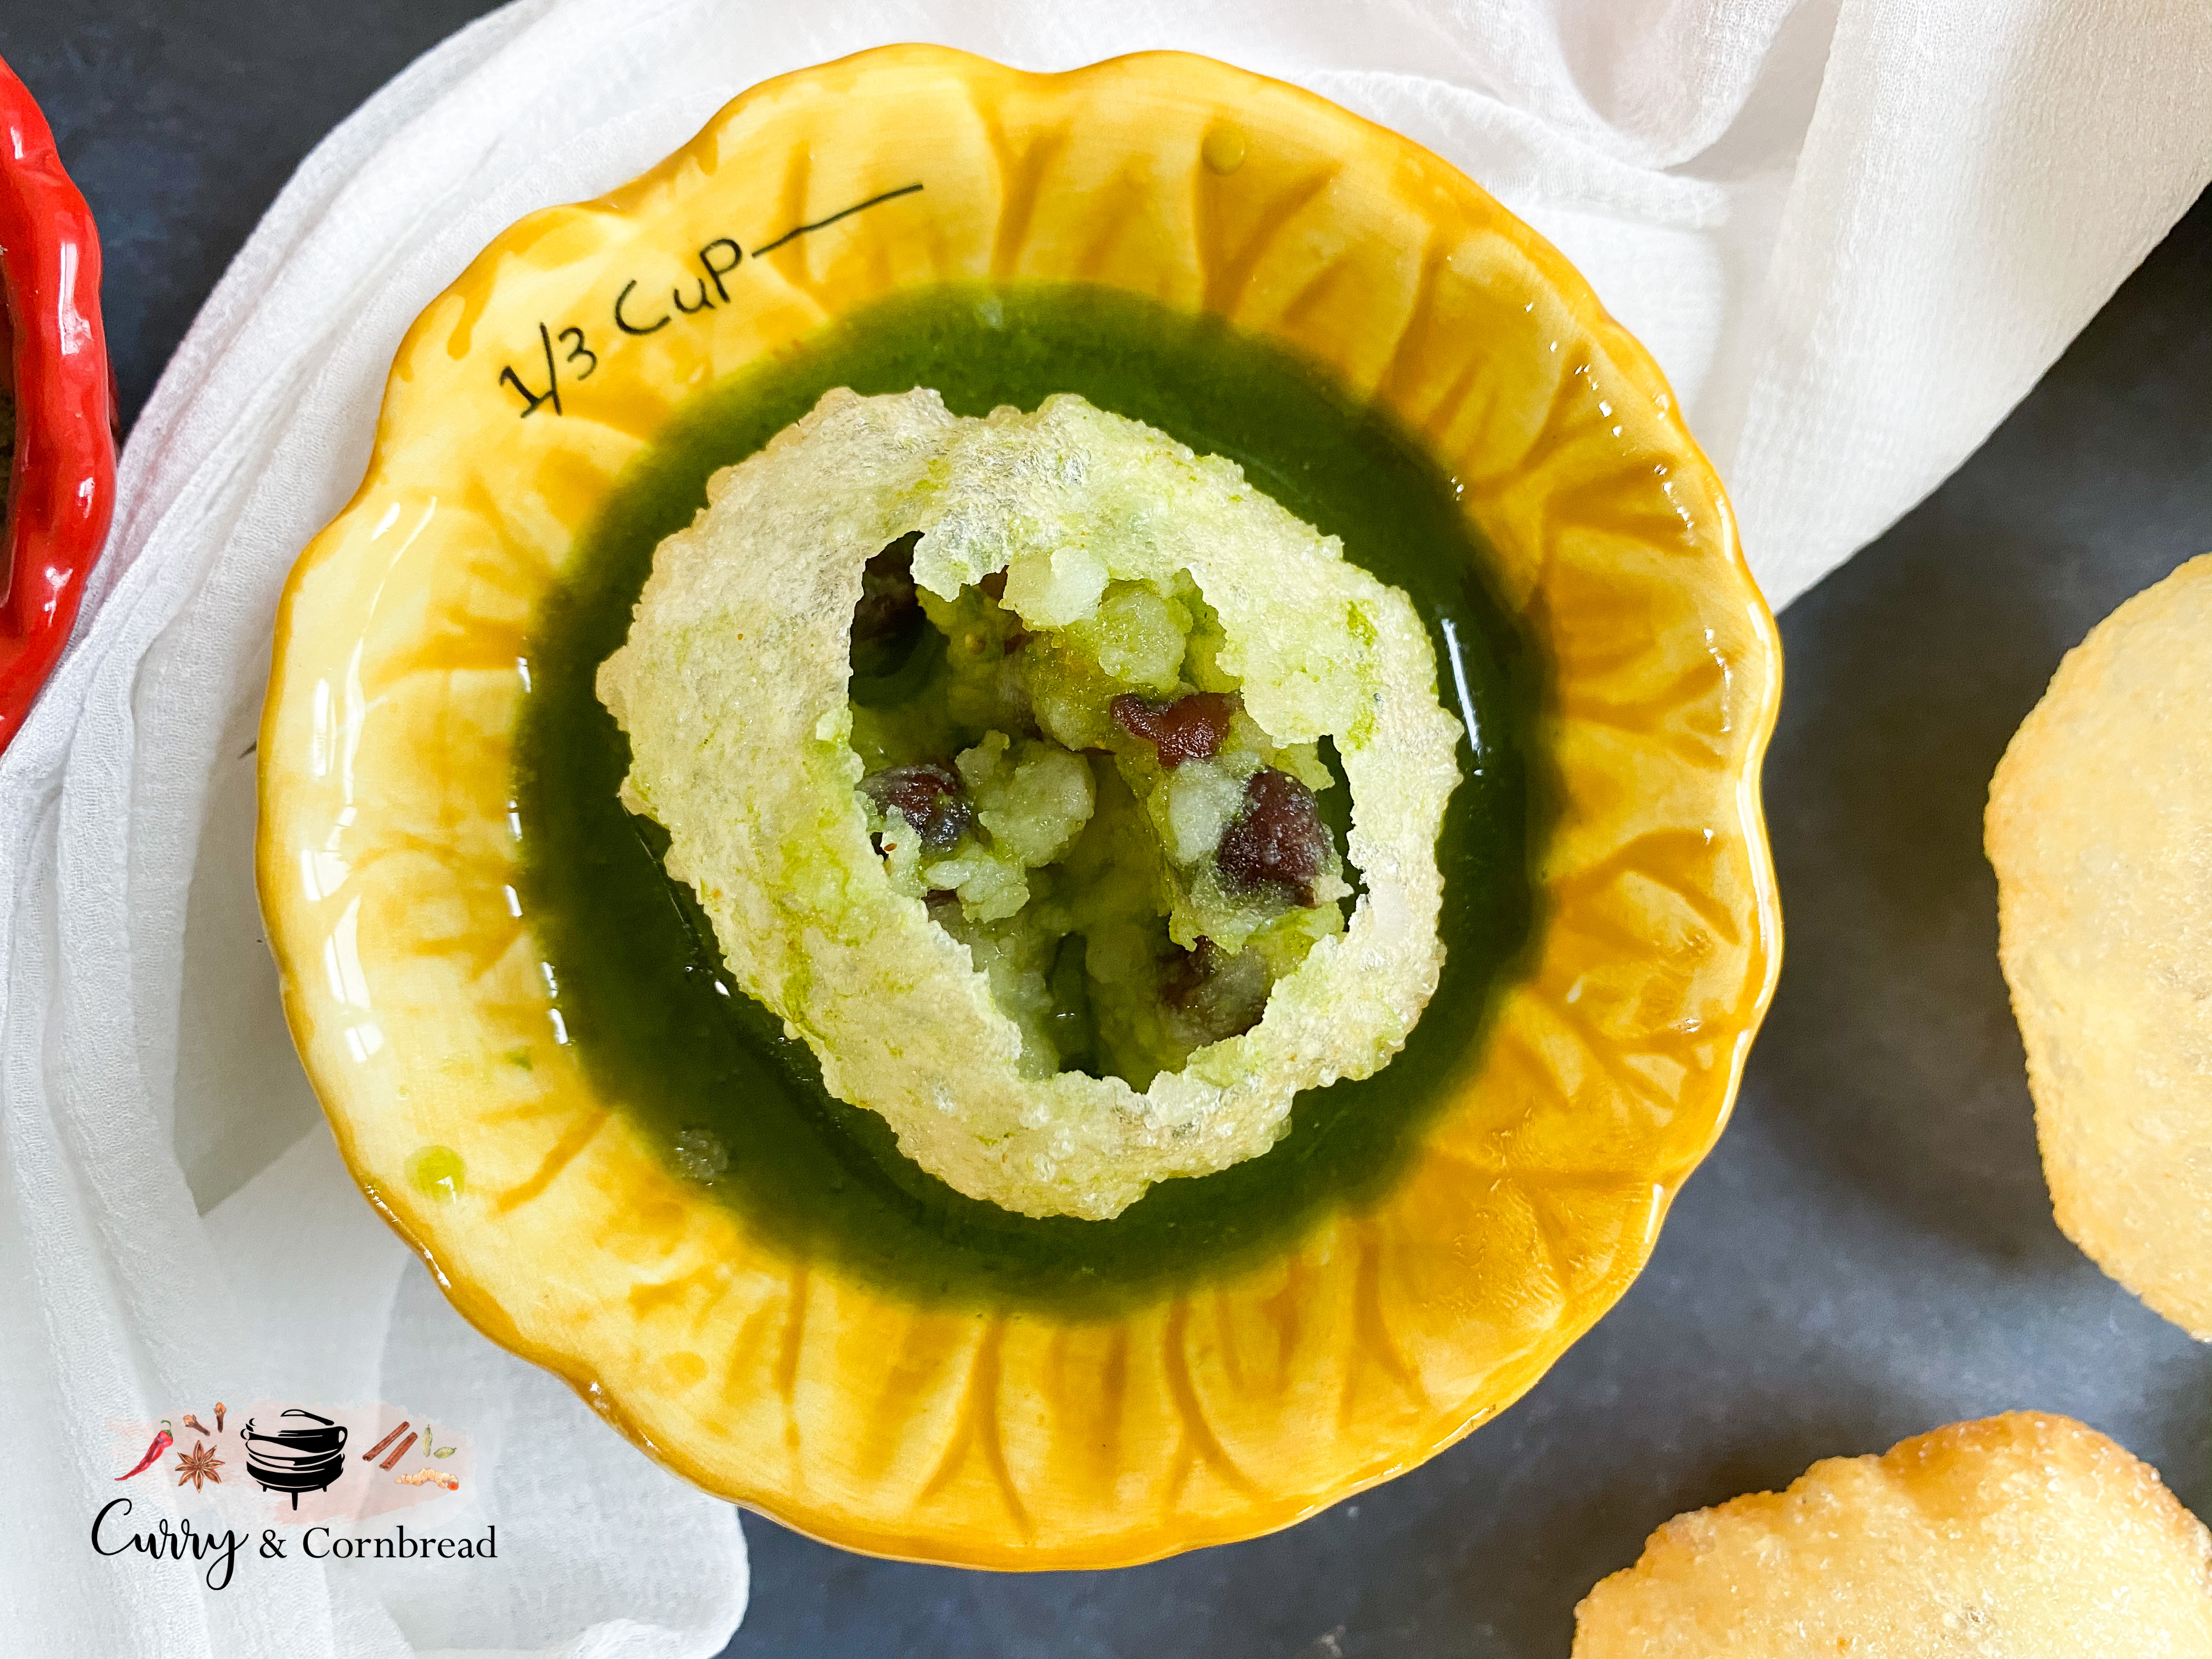
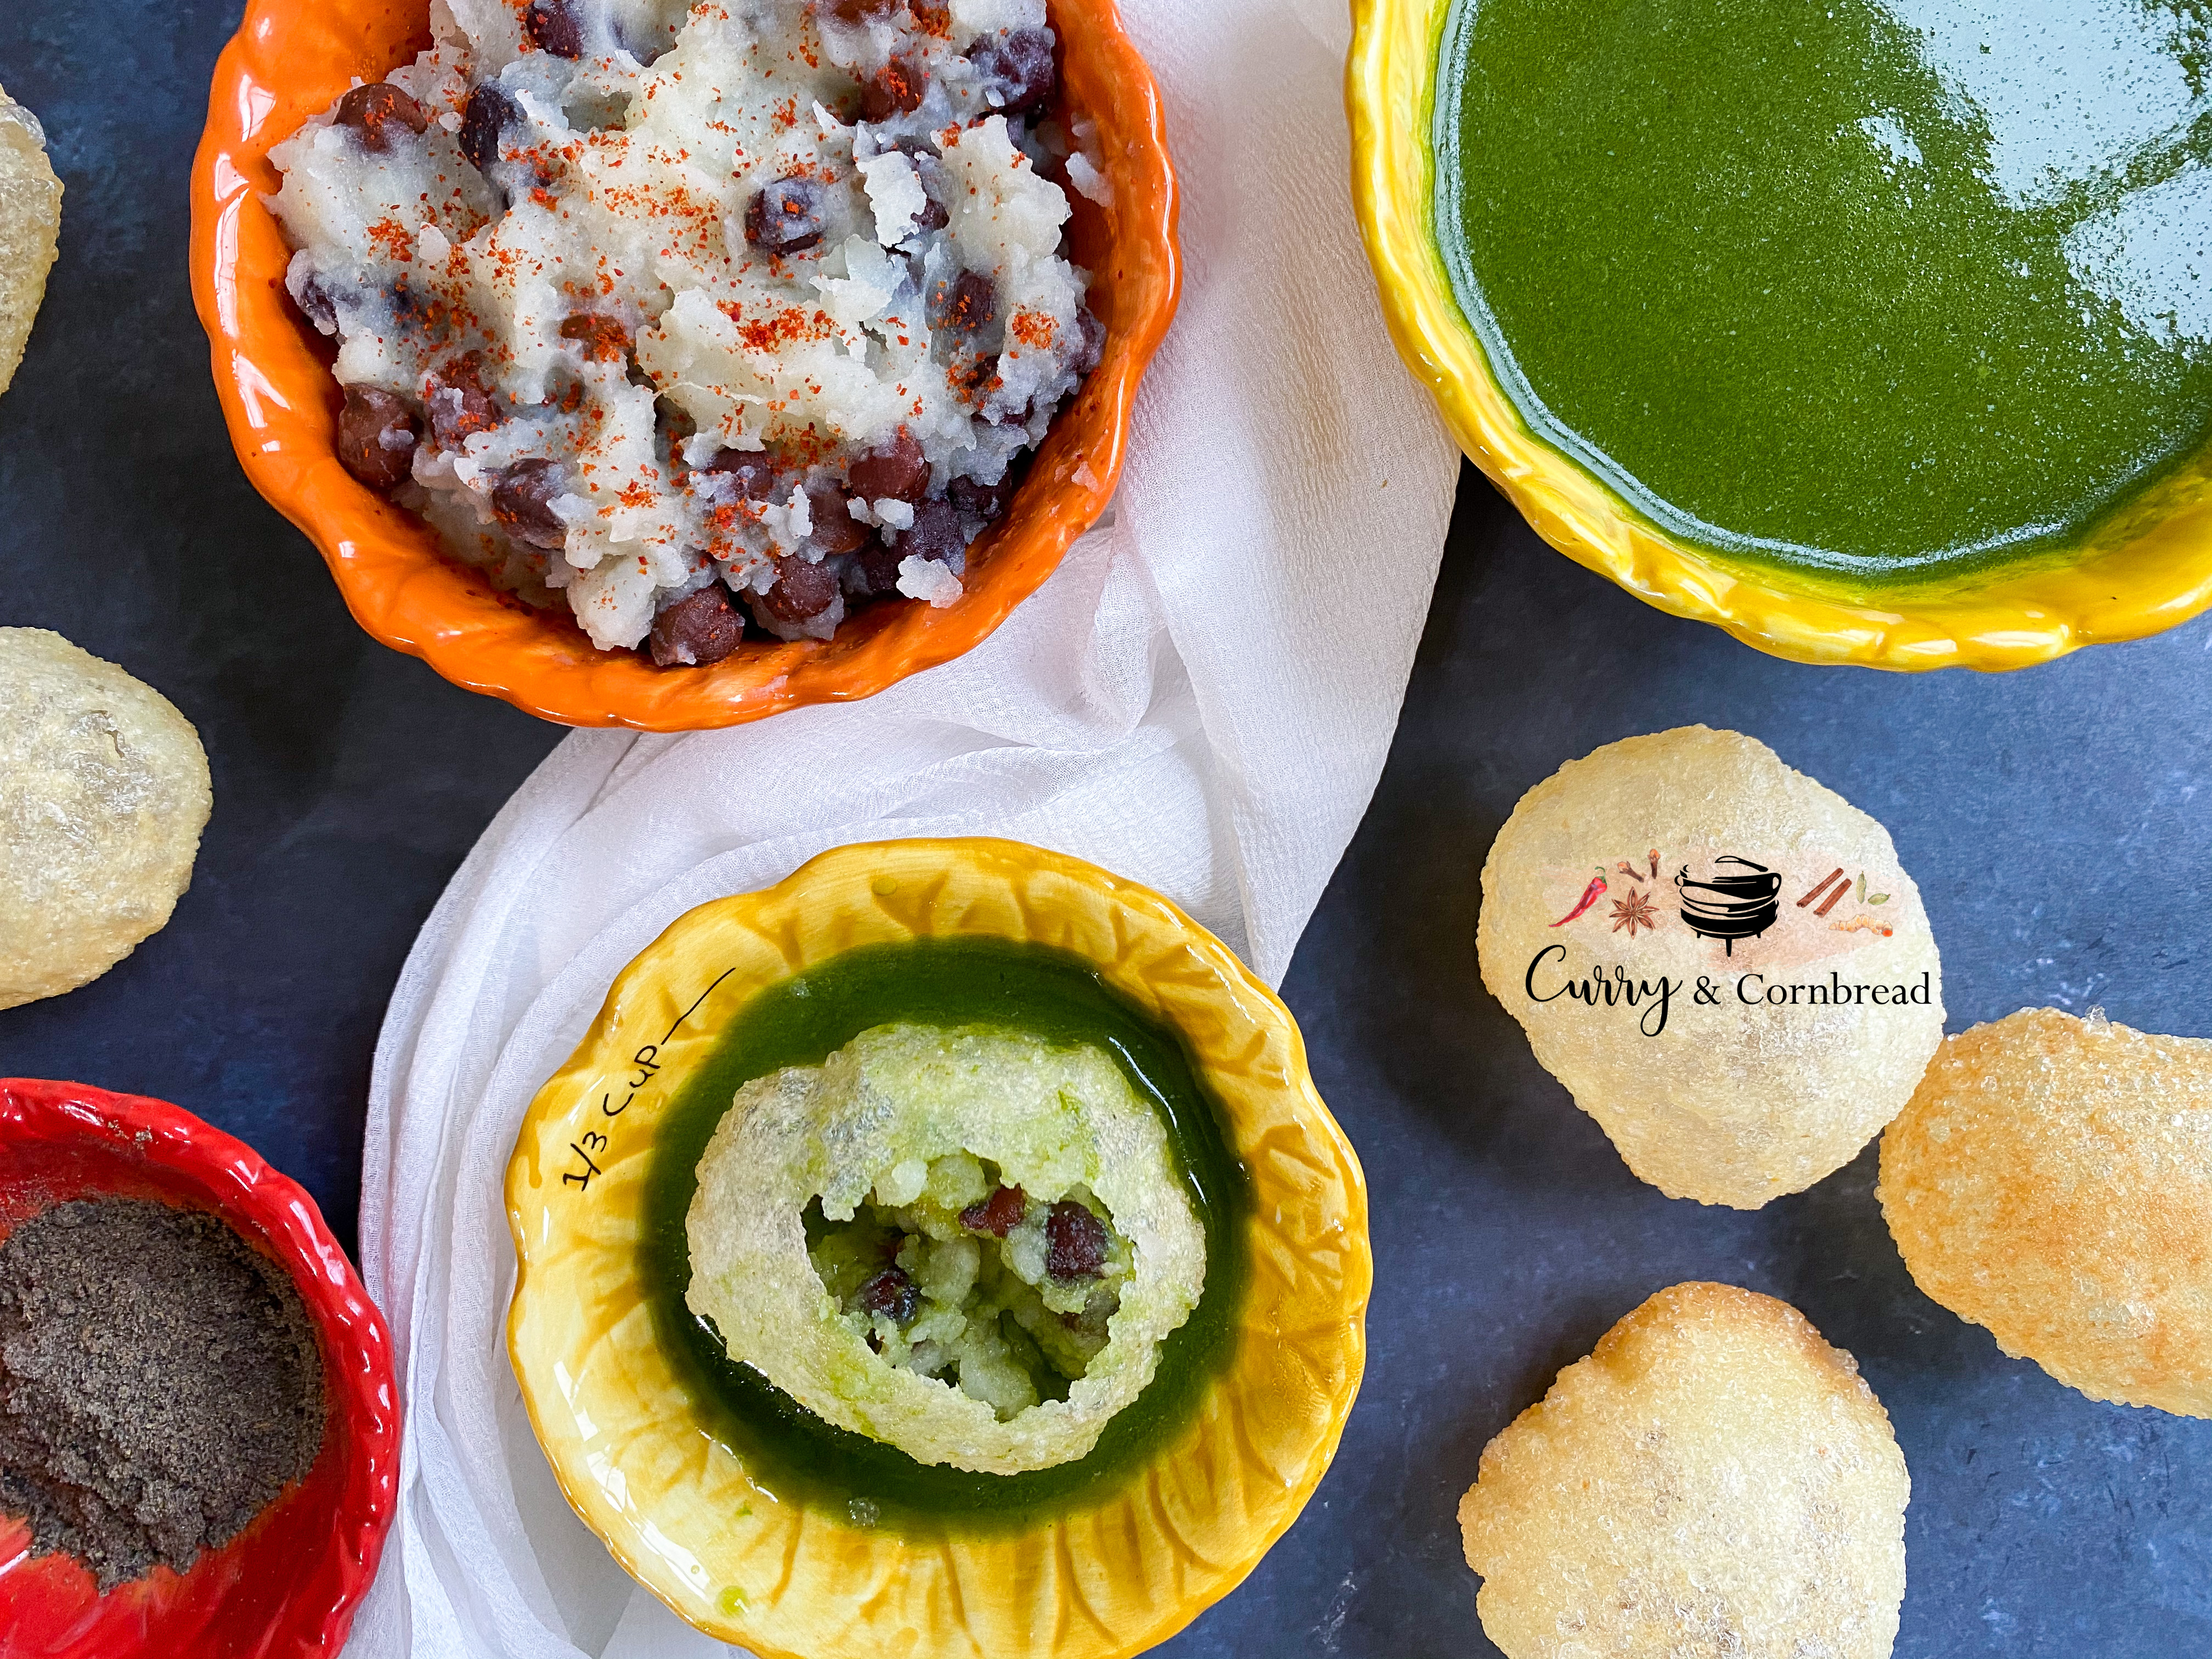
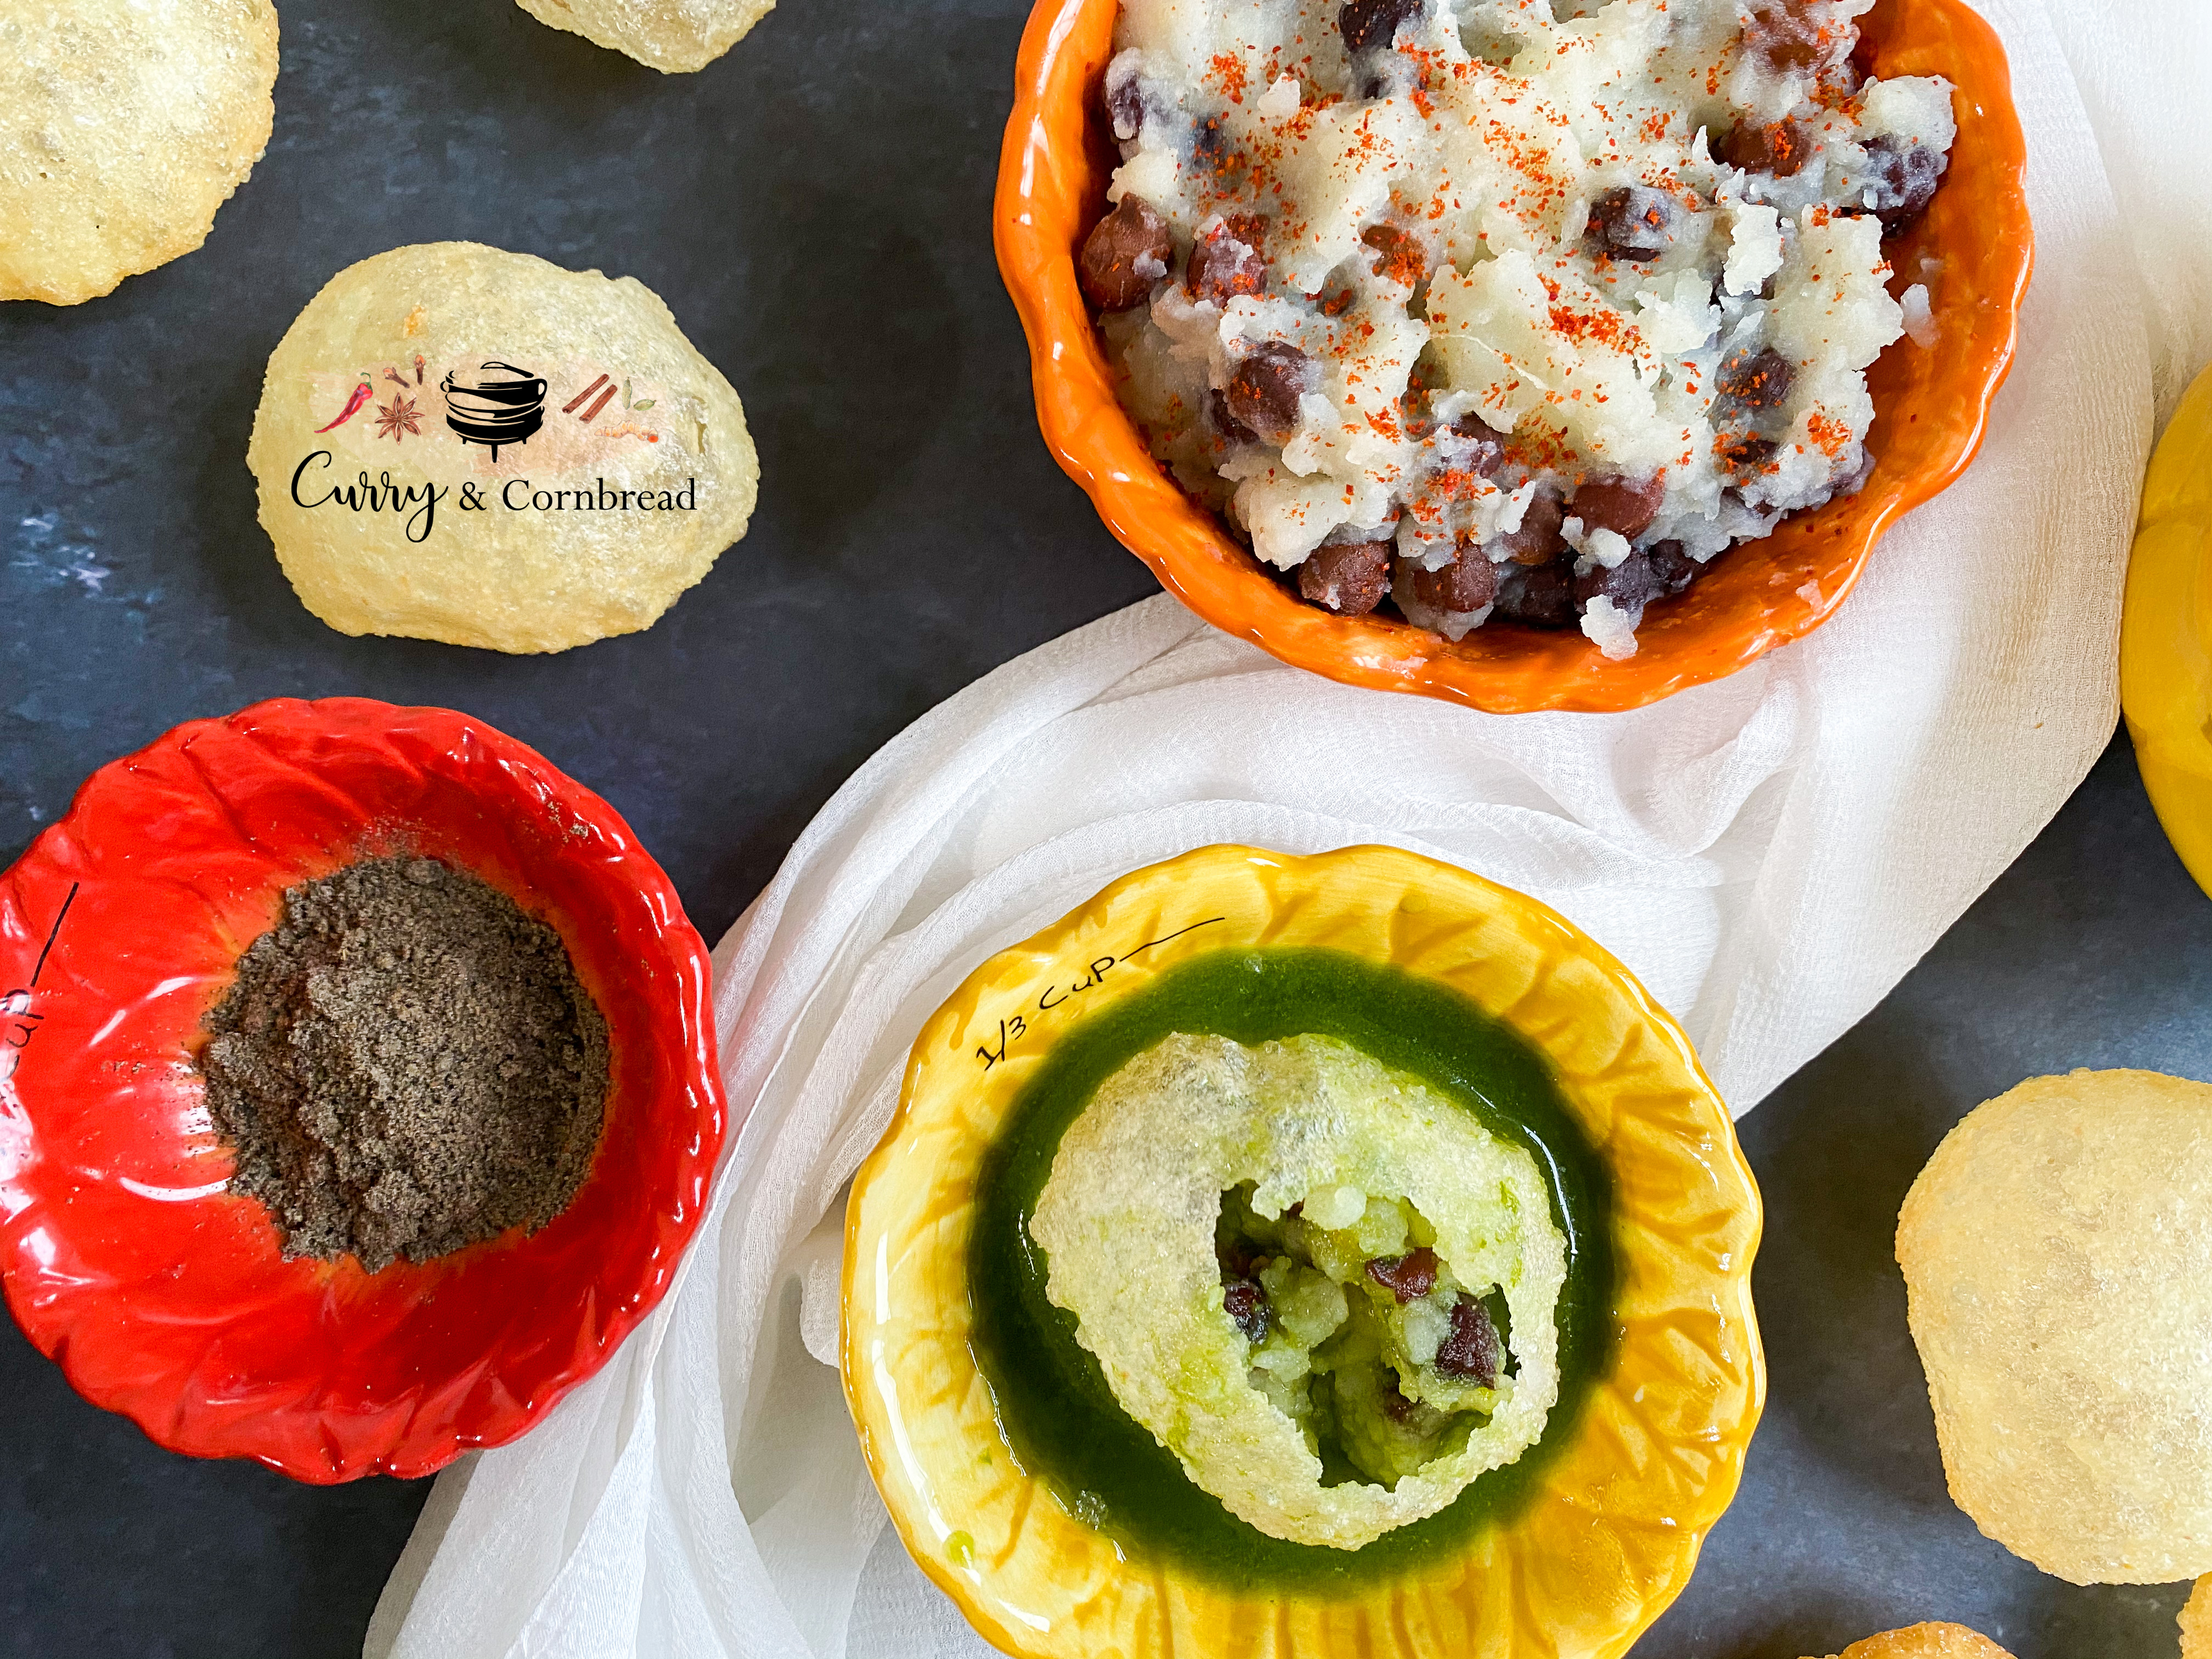
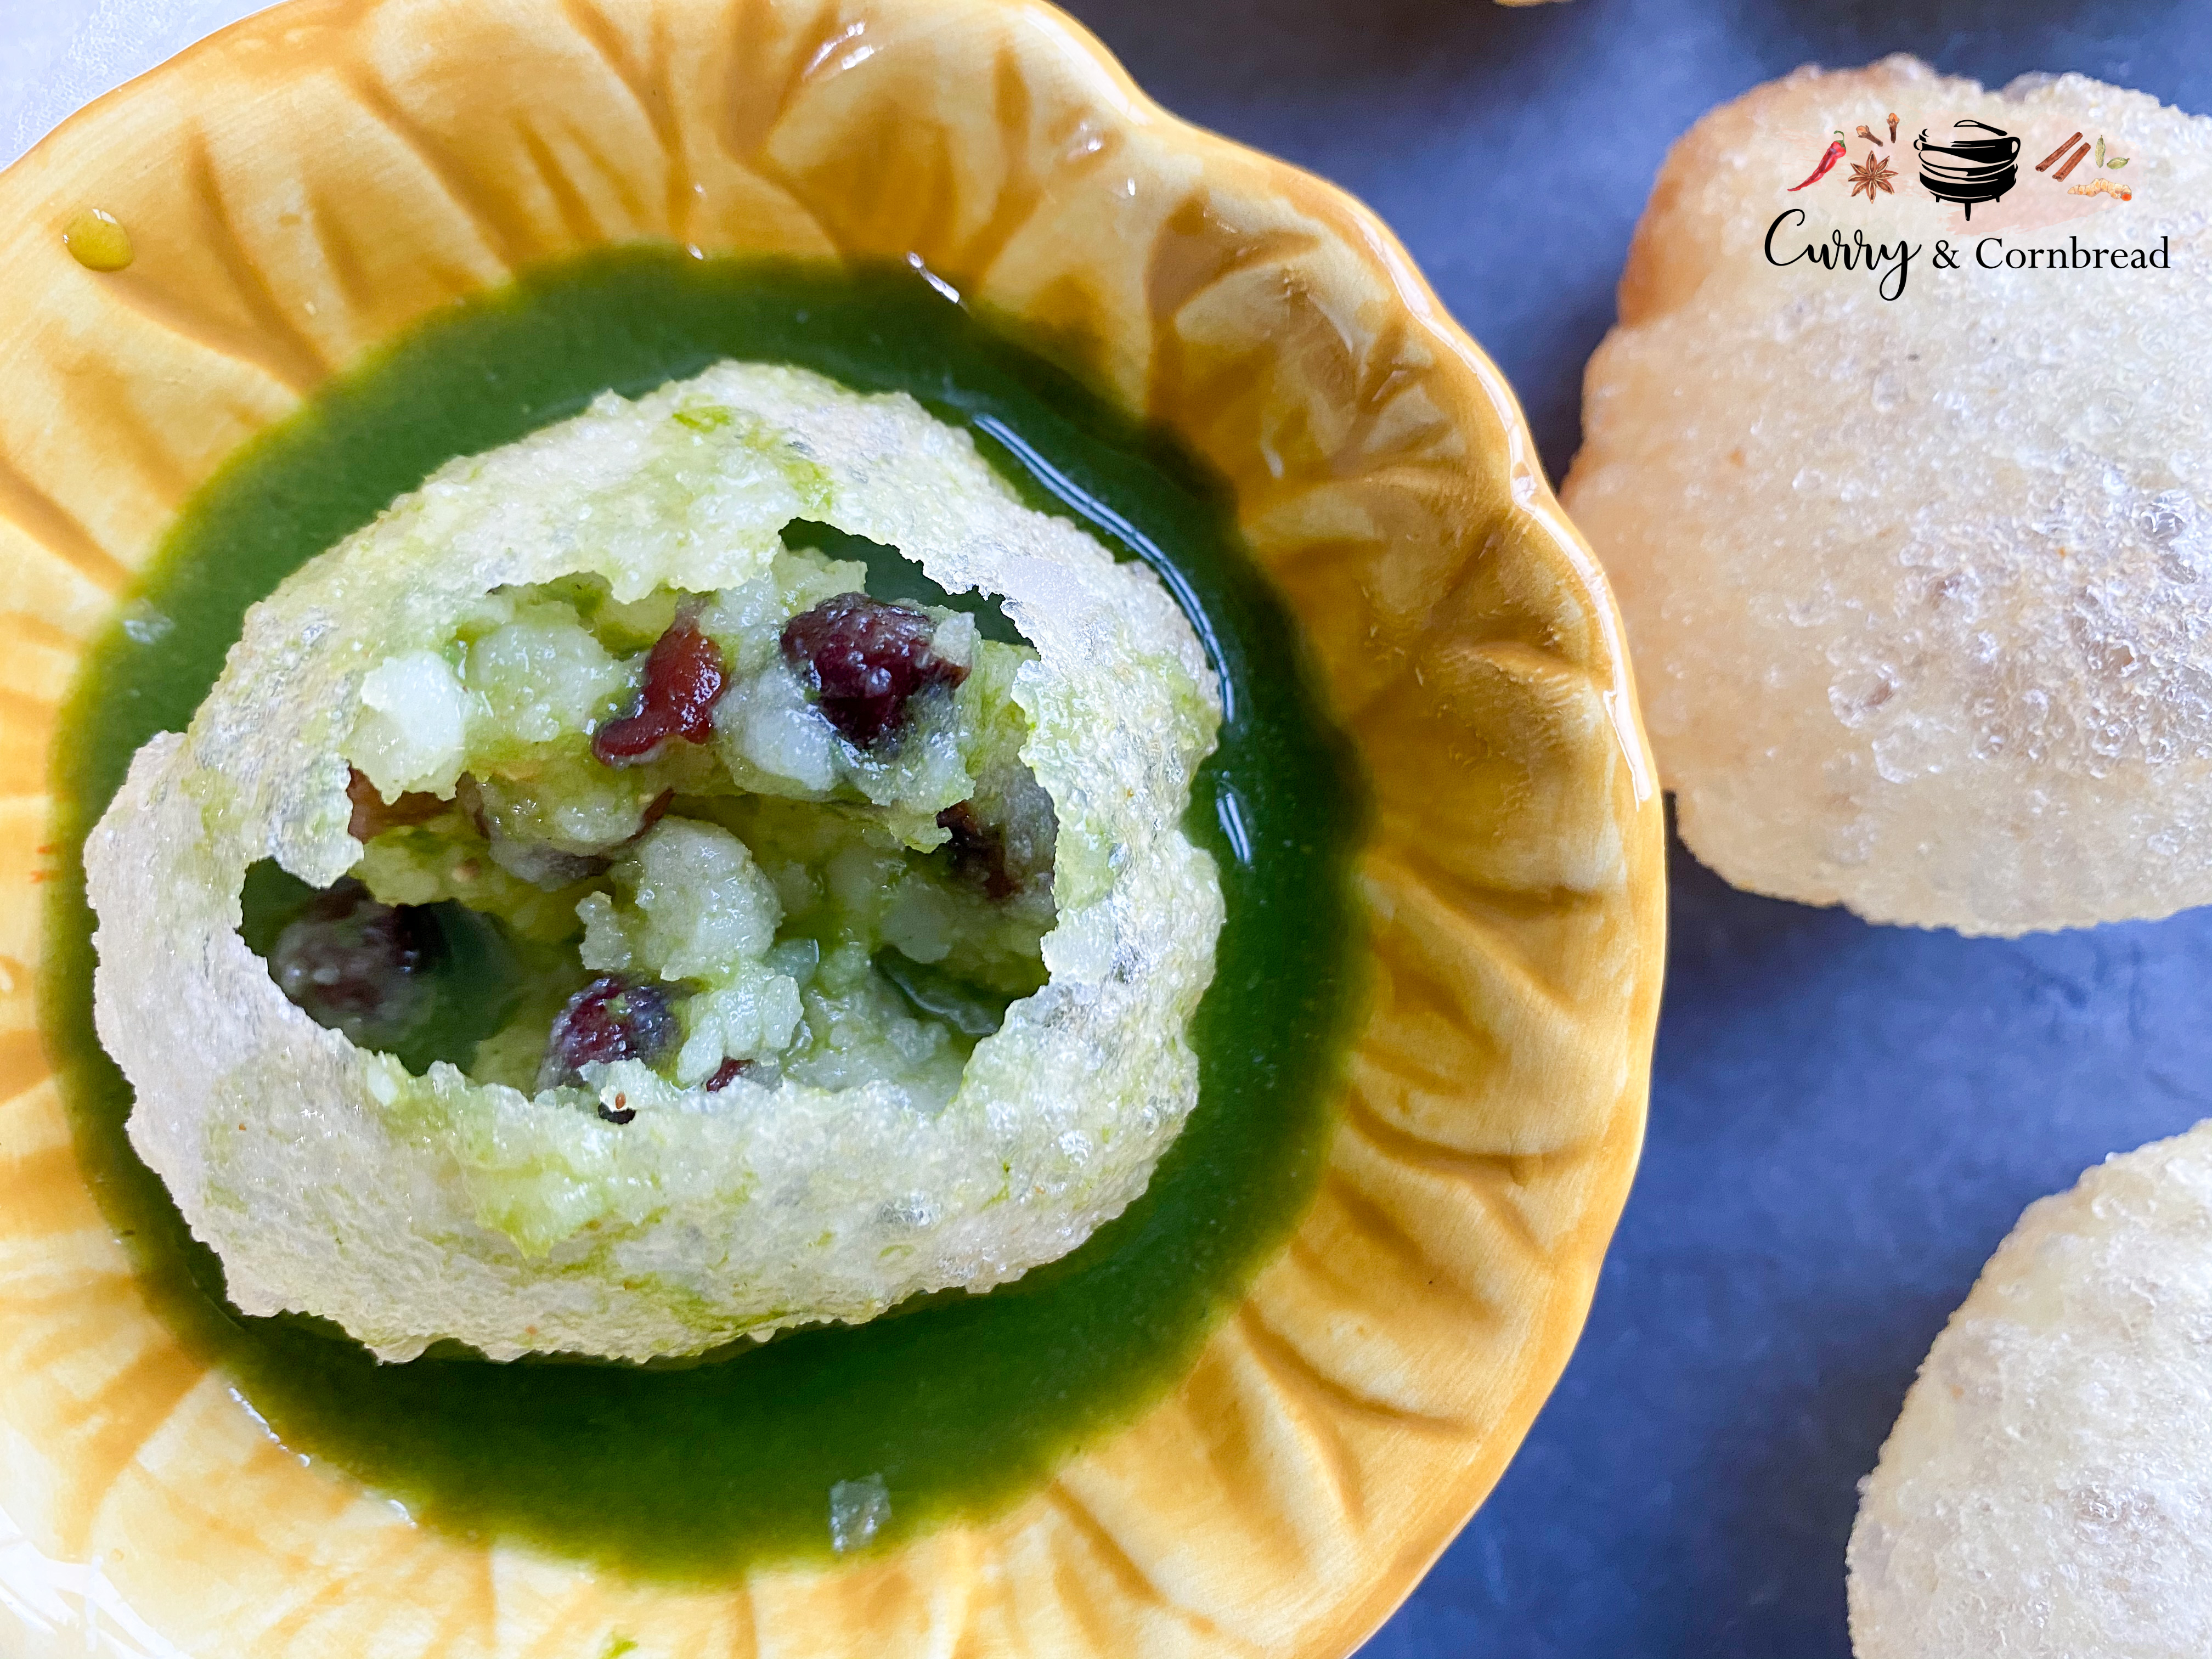
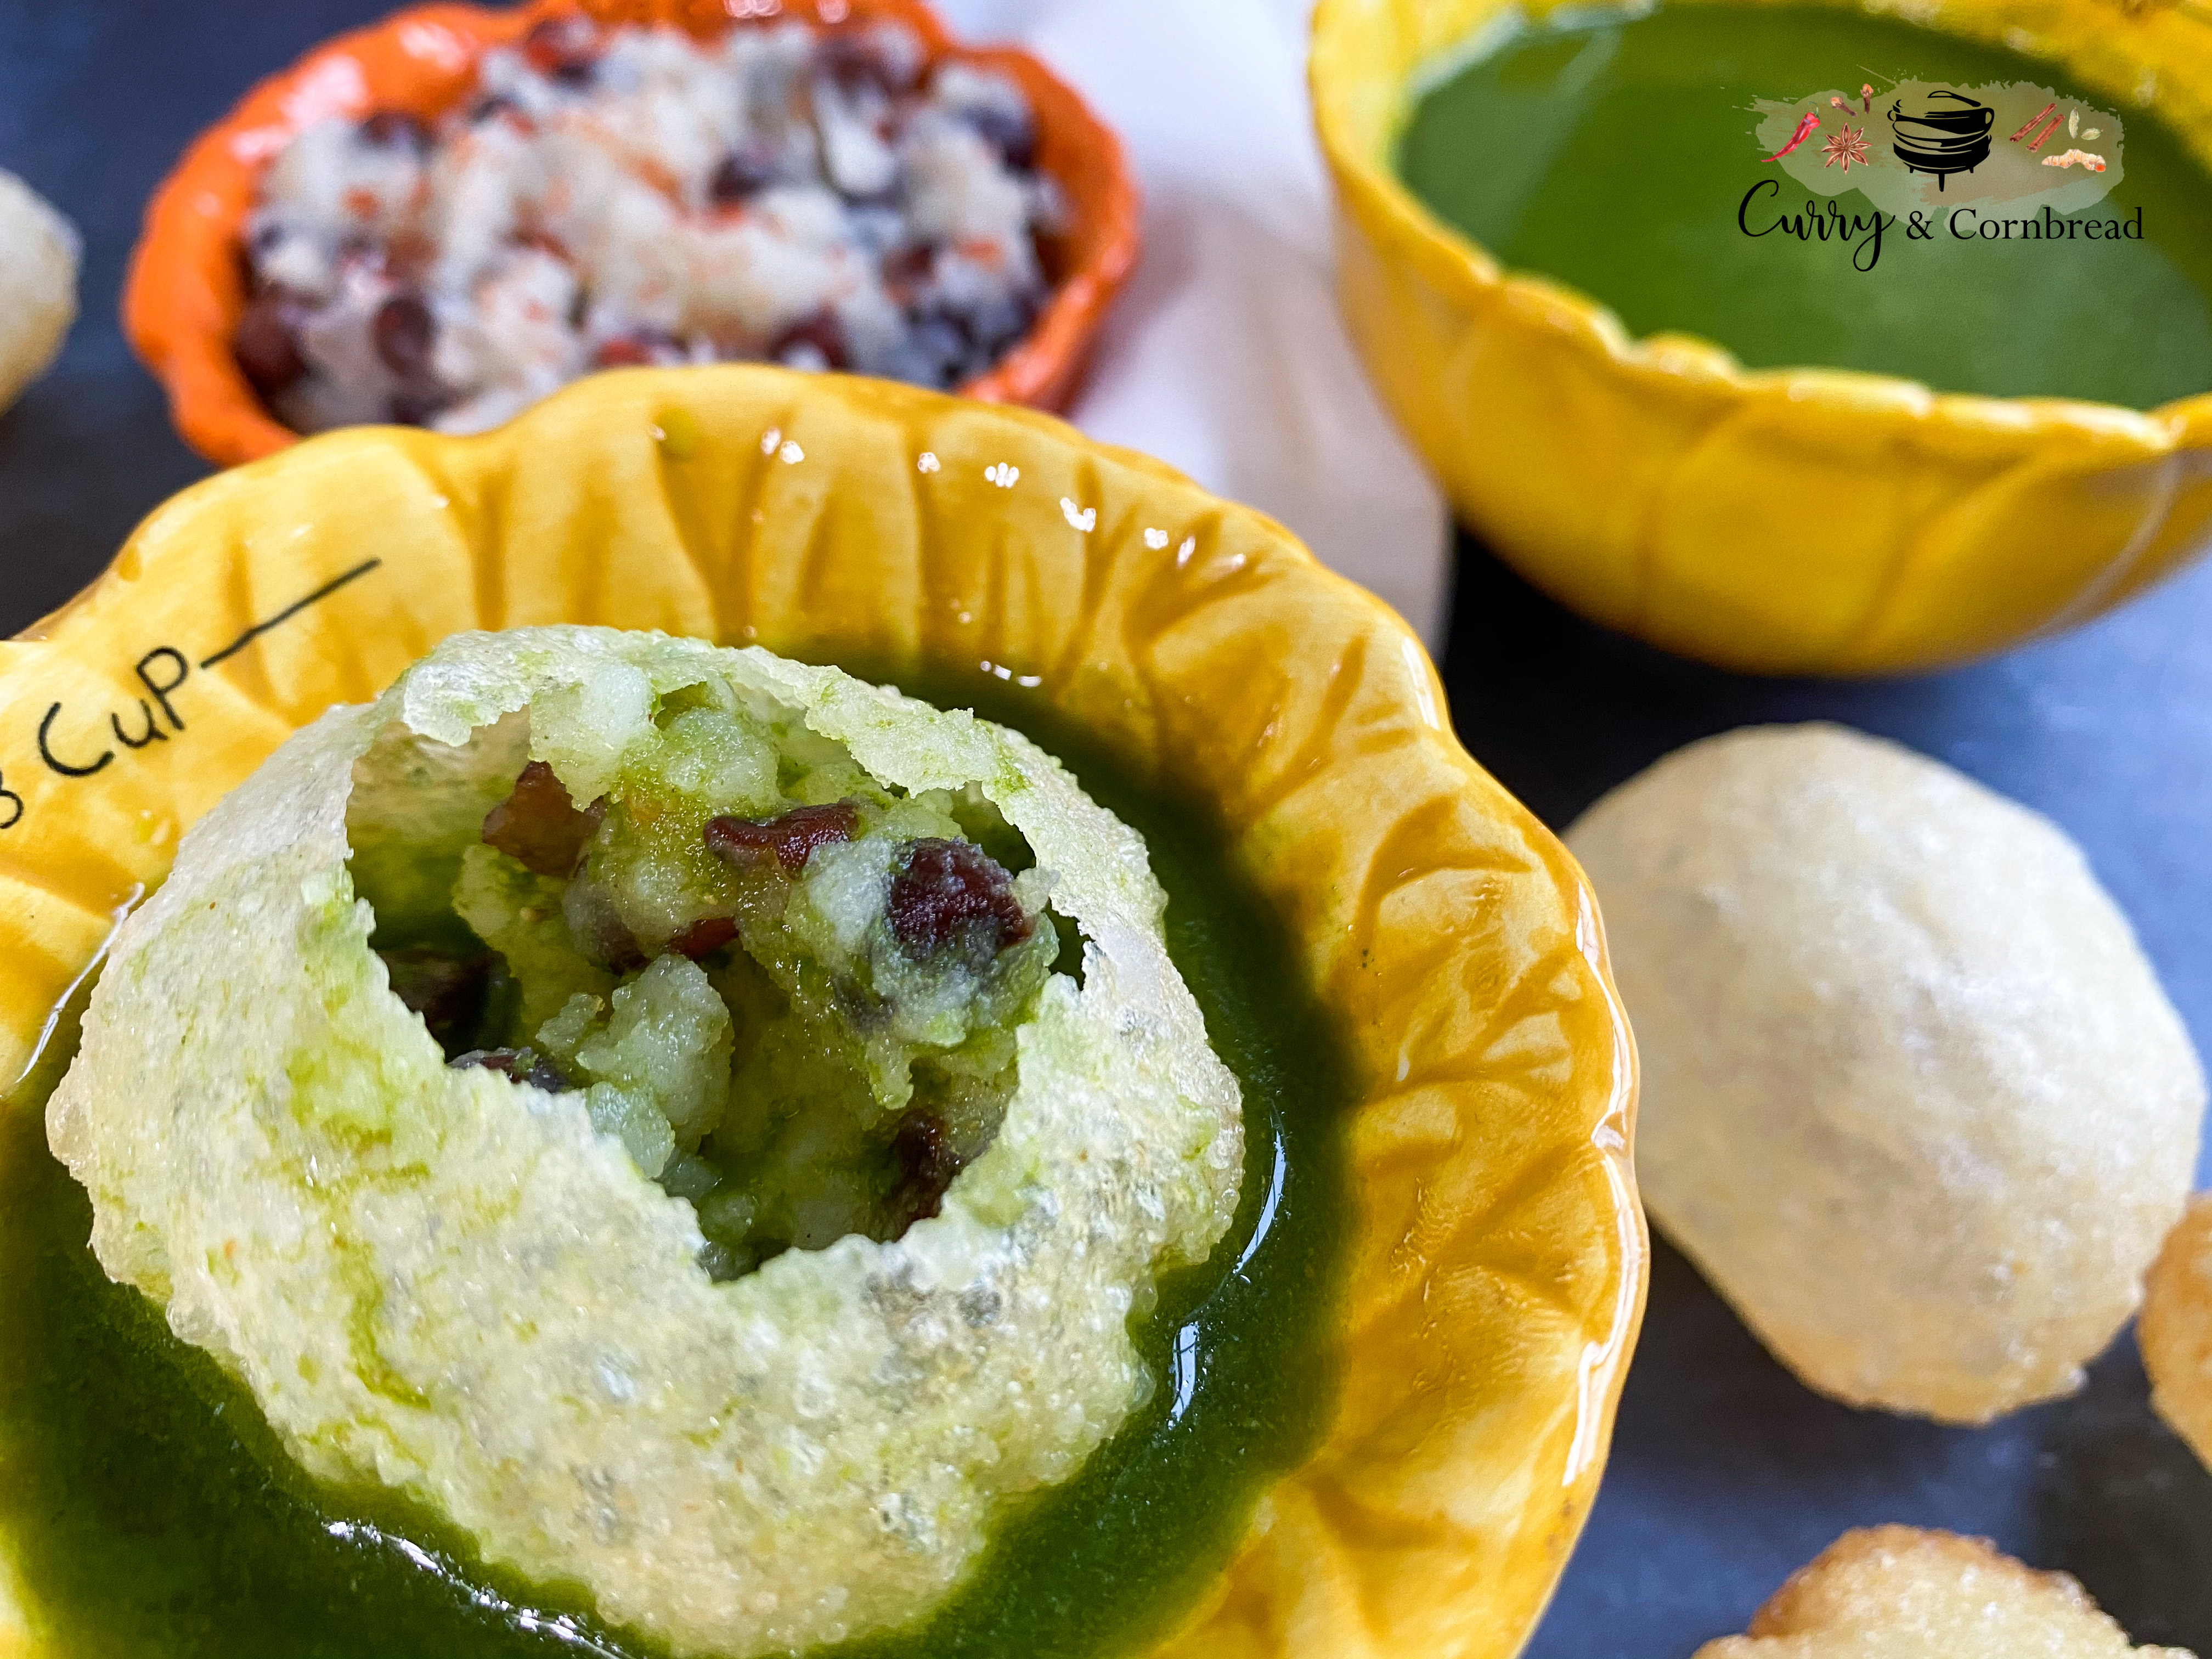
2 boiled potatoes
1 ½ cup of boiled black chickpeas
Pink salt to taste
1 tsp roasted cumin powder
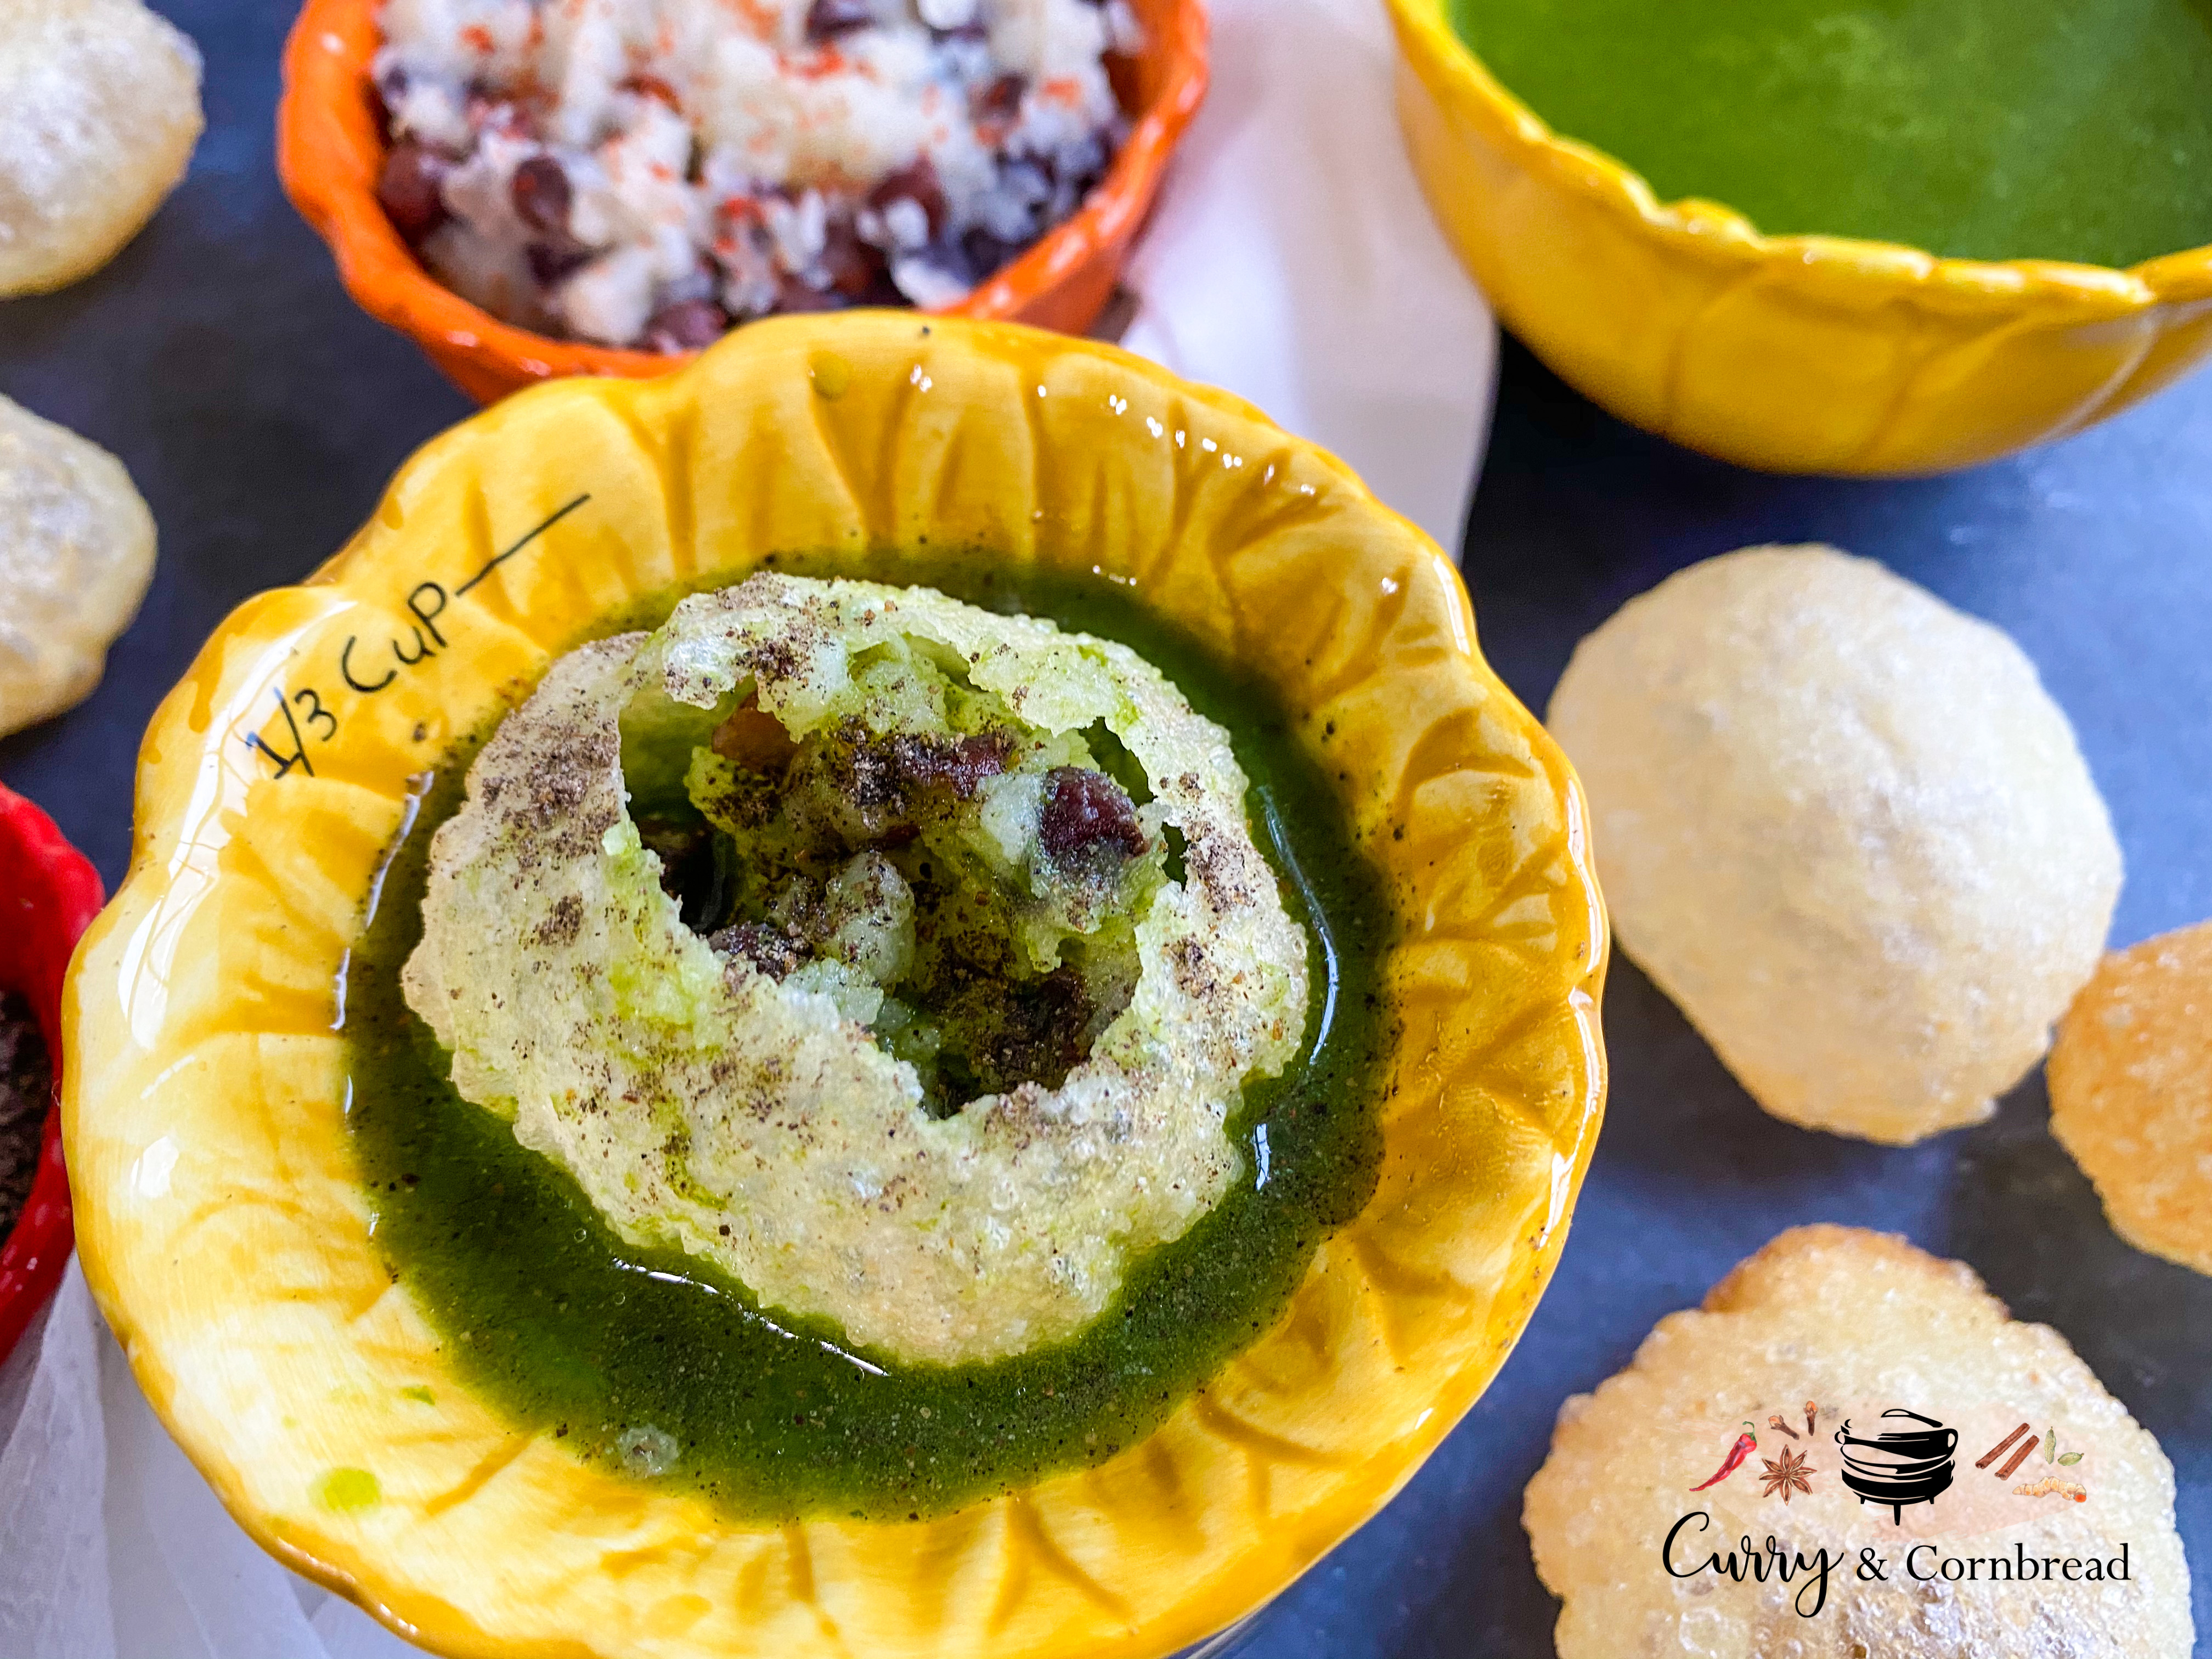
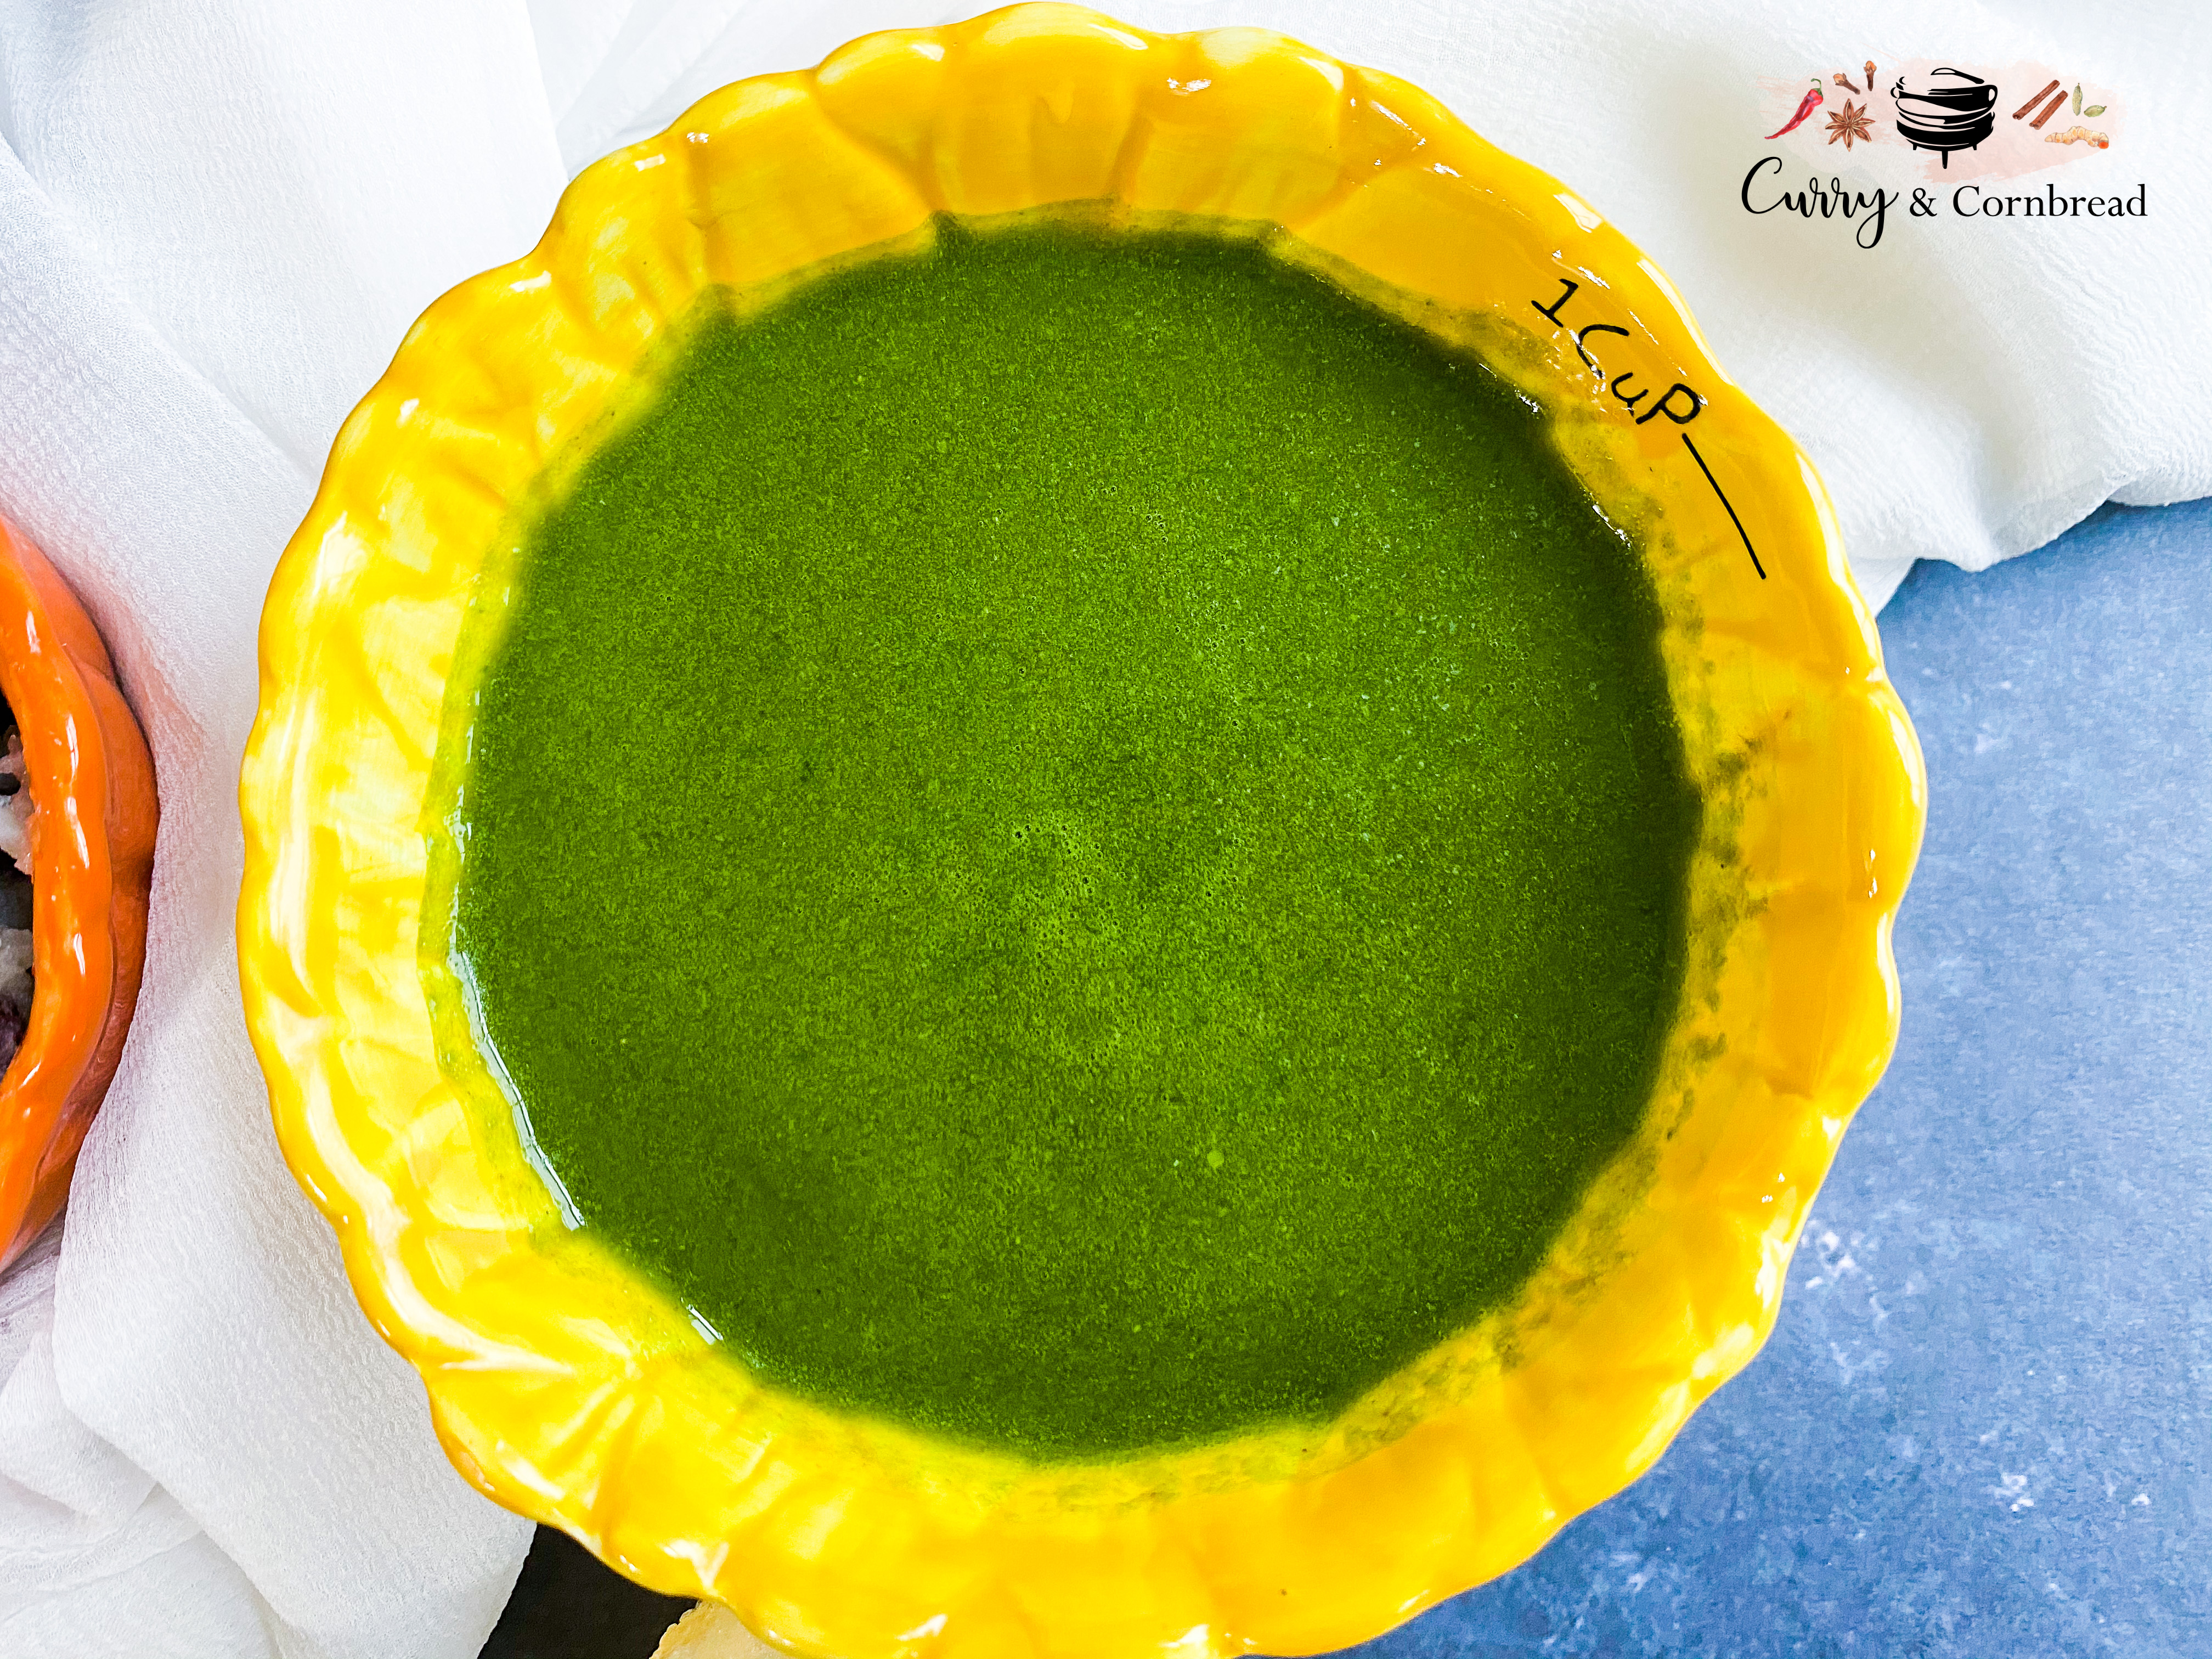
For Pani
1 bunch of cilantro
1 large bunch of mint
6-8 thai chili peppers (adjust to taste buds)
2 tsp roasted cumin powder
1 garlic clove
½ inch ginger piece
1 tbsp lemon juice
4-5 tsp pink salt (adjust to taste)
6-8 cups of water
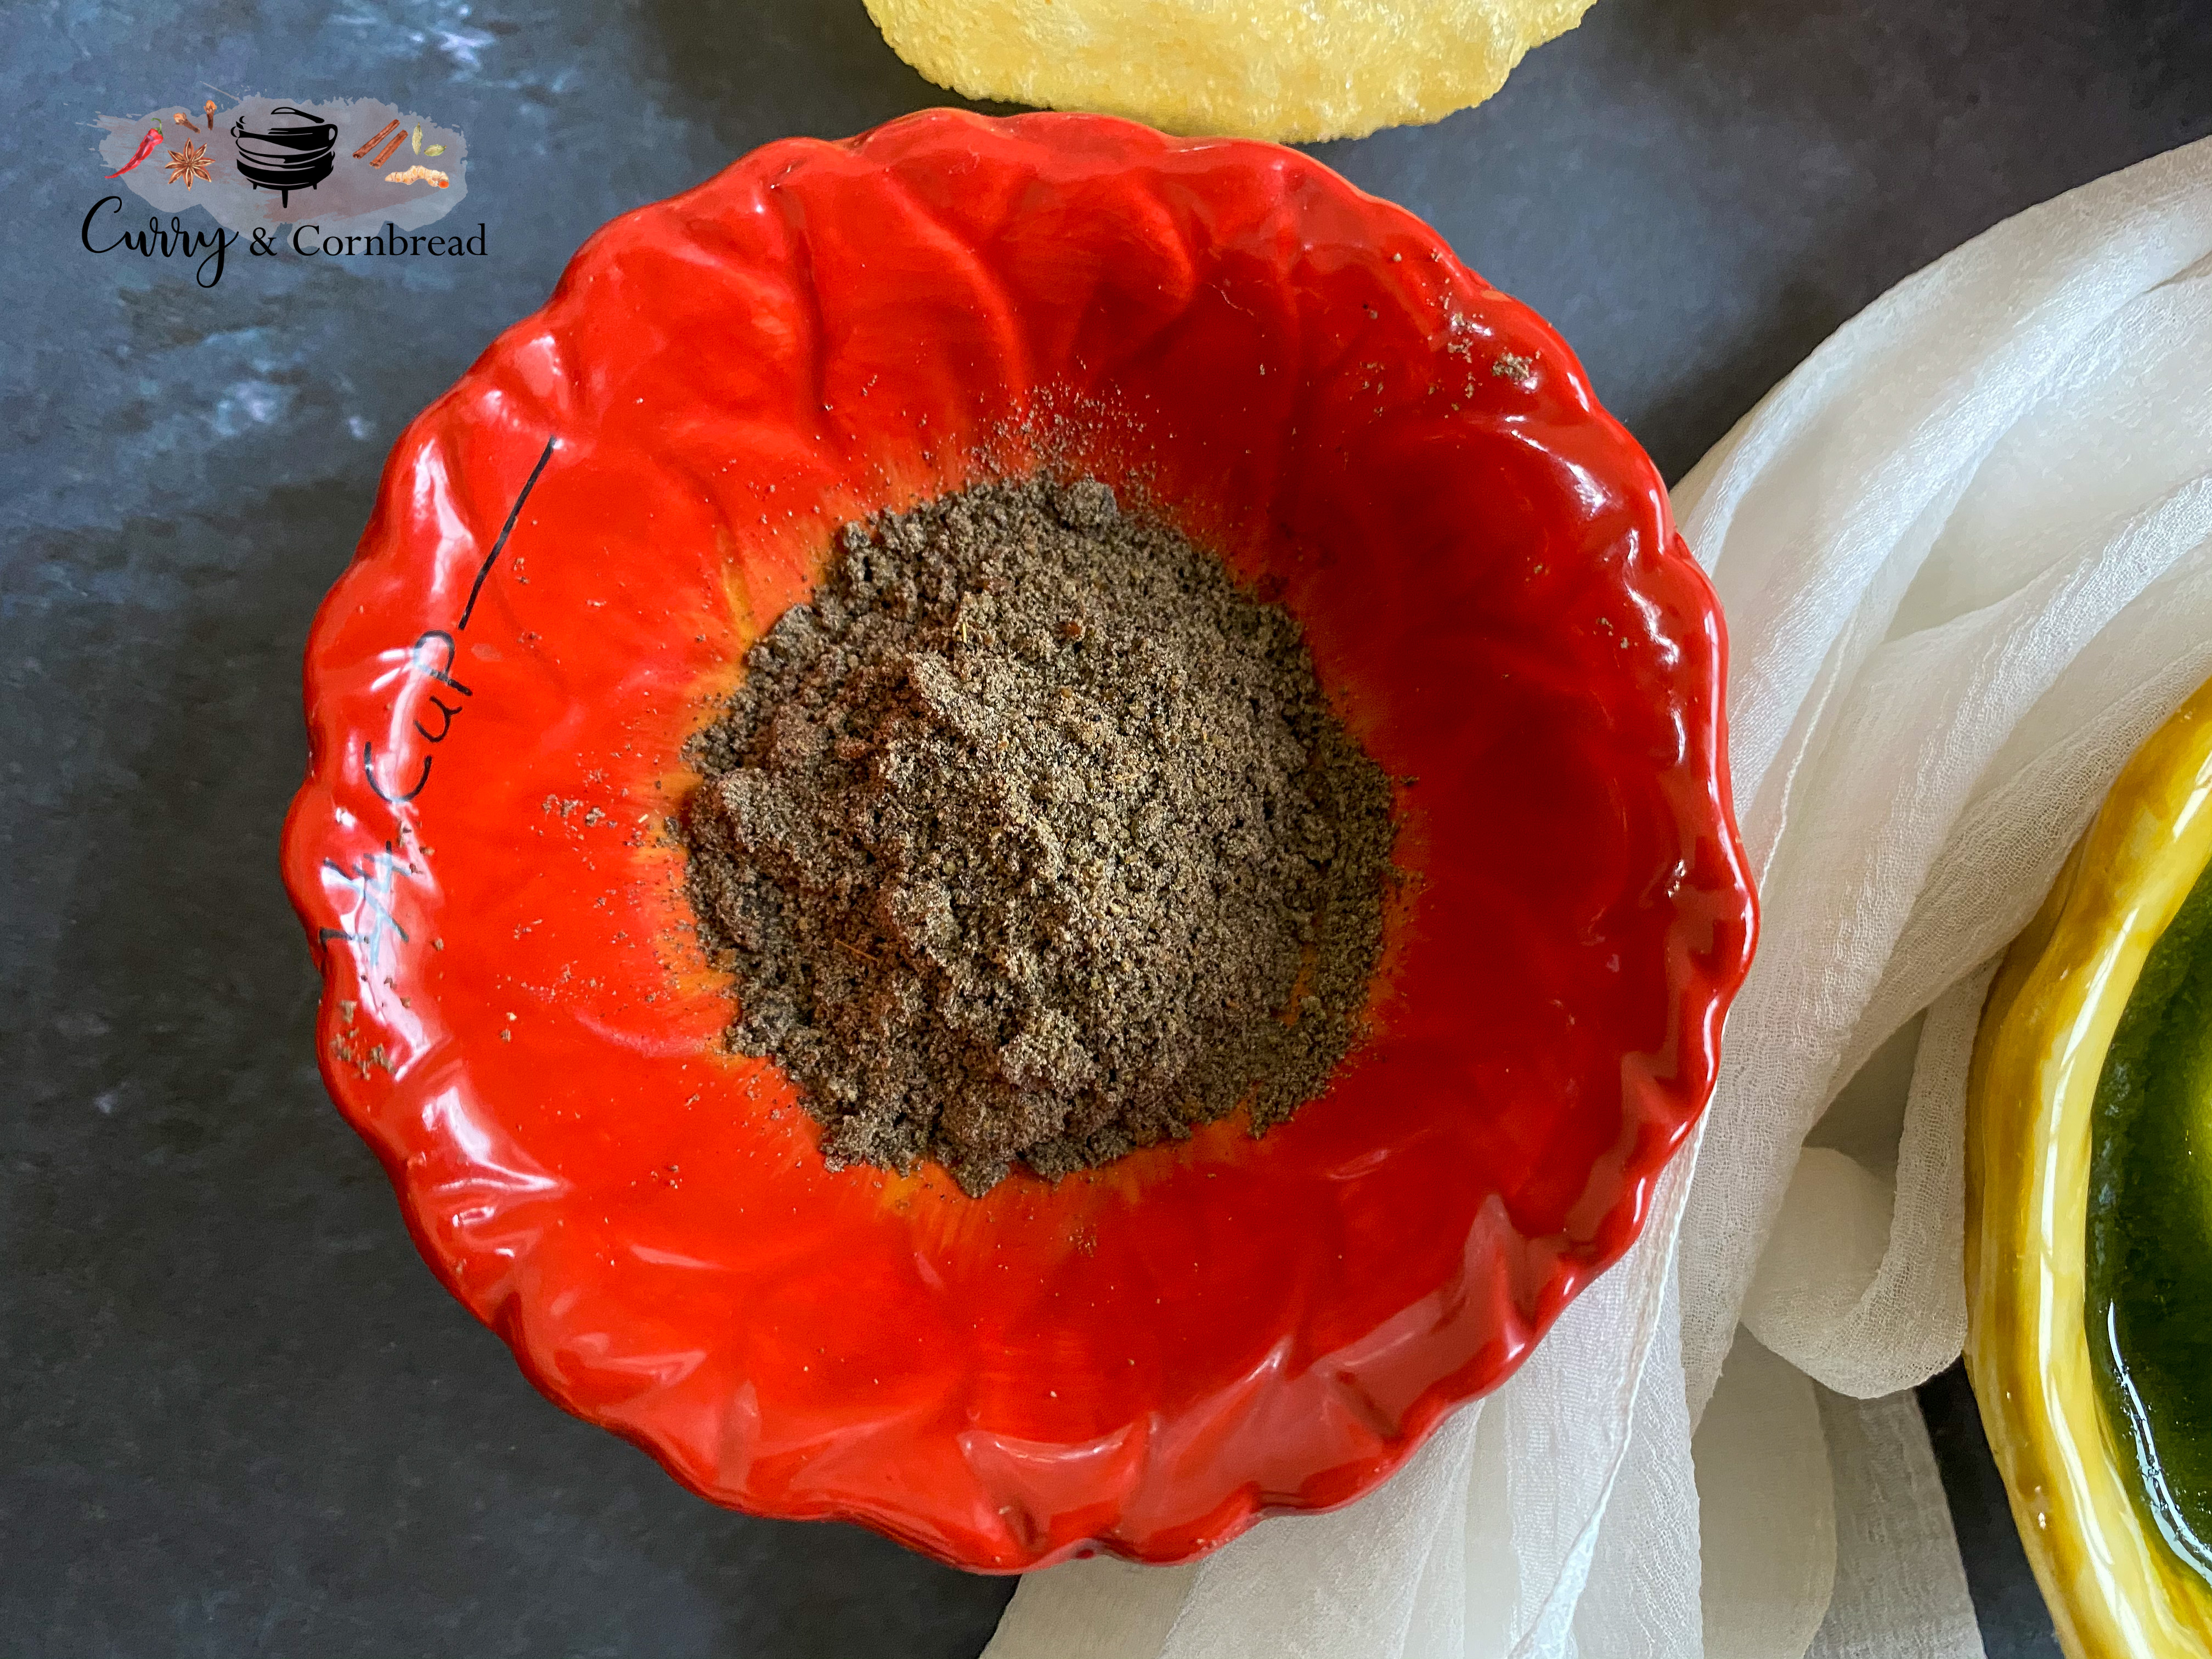
For Dry Masala
100g kalonji seeds
100g whole black peppercorns
75g pink salt (sanchar)
Method
For Puri
In a large bowl, add all the dry ingredients and mix thoroughly. Add 1 tbsp of water at a time while kneading the dough smoothly. Remember sooji (semolina) absorbs water, so if you knead a very stiff dough, it will difficult to roll out the dough later. Try to knead a smooth dough that is neither too soft nor too hard. This process should take approximately 6-8 minutes. Cover the dough with damp kitchen cloth and set it aside for 20 minutes.
Heat oil over medium heat. Make little balls with the dough and then roll each out or press it in roti maker. You can also make a big circle and cut small circles with cookie cutter. Over medium heat once oil is hot, fry the puri until golden brown. Drain excess oil and let it cool. Store in air tight container.
Make sure the oil isn’t too hot, otherwise the puri will be soft and will turn brown easily.
For Dry Masala
Roast everything over low flame and let it completely cool. Blend until smooth. Mix thoroughly and store in air tight container for up to 6 months.
For Stuffing
In a medium bowl, add boiled potatoes. Mash the potatoes well. Add boiled black chickpeas along with seasonings. Mix it well together and set it aside until its time to serve.
For Pani
In a blender, add cilantro, mint, chilies, ginger, garlic and ½ of the water. Blend until everything is pureed. Remove it in another bowl, add all the seasonings and other ½ of the water. Adjust salt/chili (heat) to taste. Mix everything well together. In our home, we love our water extremely spicy, however you all can adjust the chilies to your spice level. Store in the refrigerator until time to serve.
Assembling Pani Puri
Poke holes in the Puri’s. Fill them up with the potato/chickpea stuffing. Add as much Pani as you like and enjoy it! If you like eating dry Puris towards the end, then just skip the Pani and garnish with dry masala instead.
Notes
You can make all most all the ingredients ahead of time. I usually make dry masala in big batch and store it in air tight container, as its good up to 6 months. I also make the Puri ahead of time. I usually make the stuffing and Pani (flavored water) the same day, however the Pani tastes much tastier the second day.
